
Bake Bread With Gin Lee
Written by the Author: Gin Lee
Copyright ©2023 by Gin Lee

Bake Bread with Gin Lee
In this featured cookbook, I have compiled numerous of my very own homemade, tried-and-true bread recipes, along with one of my great grandmother's "Cherokee Fried Bread" recipes. Each bread recipe is extremely delicious and I hope that all my readers and home-cooks will enjoy them immensely.
This book is written in dedication to all home-cooks and cooks in general!
Are y'all ready for this? Well then, let's bake some bread!
Note:
Soft country white bread
Soft bread, anyone? Yes, it's that time again! Today, I wanted to share my soft country white bread recipe with you guys. With this recipe, you'll be able to make two delicious 8-1/2 x 4-1/2 loaves of soft white bread. If you're not needing two loaves of bread, you can still make two loaves in advance and freeze one for later use, or you can make one larger loaf.

Instructions:
4-1/4 cups of all-purpose flour plus about a 1/4 cup extra to roll and divide the dough
1-2/3 cups warm tap water, divided
2-1/4 teaspoons of active dry yeast
2 tablespoons of Splenda or sugar
1 teaspoon of seasoning salt
1-1/2 tablespoons of softened butter plus 2 tablespoons of melted butter were used to brush over the dough before baking and during baking.
Instructions
In a large bowl, combine the yeast and half of the warm tap water. Stir, then allow the yeast to proof for 5 minutes. Add the rest of the water, Splenda or sugar, seasoning salt, softened butter, and 4-1/4 cups all-purpose flour to the bowl.

With your hands or a mixer with a dough hook, knead the dough until it comes together, about 10 minutes. The dough should be soft at this point and not sticky. If your dough is still too sticky, slowly add extra all-purpose flour and work it into the dough.

Now, grease another bowl with melted butter or cooking oil and transfer your dough to the bowl. Cover the bowl with a clean tea towel or use plastic wrap.
Allow your bread dough to rise in a warm area for about 45 to 50 minutes, or until it has doubled in size. Then turn the dough out on a floured surface and divide it into two equal halves. Roll and form both pieces of dough into a loaf shape.

Next, generously grease two 8-1/2 x 4-1/2 bread pans. Then transfer your dough, seam side down, to the prepared bread pans. Allow the dough to rest for another 40 minutes, or until it's doubled.
Transfer your loaf pans to the oven and bake your bread at 350 degrees for about 30 minutes, or until it is done. During the last 5 minutes of baking, brush the top of your bread with melted butter.

Once your loaves are baked, remove them from the bread pans and place them on a wire cooling rack to cool. If desired, brush the loaves with additional melted butter.
Slice your loaves of bread once they have completely cooled, and enjoy!

Country-style bread
Today, I am preparing my country-style bread. For those of you who enjoy a soft light loaf of bread with a lightly sweetened taste, this is a recipe that I am almost certain you'll enjoy.
If you prefer bread that has a chewy texture, add a cup of oats to the dough and adjust the amount of water as needed.
Ingredients:
•6 cups of all-purpose flour (Plus sometimes I need to use a little more.)
•1-½ tablespoons of yeast
•2 teaspoons of seasoning salt (or kosher salt, or no-salt seasoning)
•2 tablespoons of brown Splenda (or regular brown sugar)
•2 tablespoons of canola oil
•2-½ cups of lukewarm water
Instructions:
In a bowl, add the all-purpose flour and the yeast; stir. Add the seasoning salt, canola oil, and Splenda or sugar. Gradually stir in the water. (You may need less water than stated or more.) Combine well. Form the dough into a dough ball.
Cover the bowl with plastic wrap.
Allow the dough to rest for eight to twelve hours. (The dough should double in size.)
Transfer the dough to a well greased large Pullman loaf pan, large capacity Dutch oven, or half the dough to two one-pound bread pans. At this point, I prefer to brush the top of my dough with melted butter, because it gives the bread a really good buttery flavor once it's done.
Allow your dough to rest for one hour. (Just don't forget to grease whichever pan or pans you're using.)
Transfer your pan/pans to a 475 degrees F oven and bake for forty-five minutes or up to one hour. The bread will sound hollow when it's thumped by your fingers or the back of a metal spoon.
Allow your bread to cool on a cooling rack before slicing. Serve and enjoy!

Basic yeast bread
Want to make a sandwich, but you're out of bread? No problem! This recipe makes a loaf of bread that's perfect to slice thinly for sandwiches.

Ingredients:
3 cups of all-purpose flour
1-¼ teaspoon of yeast
1 teaspoon of seasoning salt, or kosher salt
1-½ teaspoons of Splenda, or regular granulated sugar
1-½ cups of lukewarm water, plus a little more if needed
2 teaspoons of canola oil
2-3 tablespoons of melted butter, to be brushed over the top of the dough
Instructions:
In a bowl, add your flour and yeast; stir well. Then add the seasoning salt, or kosher salt, and Splenda, or sugar. Then whisk the dry ingredients together.

Now, add one and a half cups of lukewarm water and two teaspoons of canola oil to your flour mixture and incorporate well. Use your hands if needed.
Cover and allow the dough to rest in a warm area for one hour.

Now, punch the dough down. Then allow it to rest for thirty-five minutes.
Next, take the dough and work it with your hands. Do this for just a couple of minutes. (Don't knead it, just pull the dough and tuck it under. Then shape it to the size of your pan.)

Using cooking spray, spray the inside of a loaf pan. Transfer your prepared dough to the pan. Brush the top of the dough with melted butter. Cover and allow the dough to rest again for at least another hour.
Transfer your pan to a 375 degrees F oven and bake anywhere from thirty-five to forty-five minutes. Watch over your bread during the last fifteen minutes. Brush the top of your bread with melted butter. Cover your bread loosely with aluminum foil if needed.
If you're using a Pullman pan, don't forget to grease underneath the lid. This prevents the dough from sticking to the top of it.
Allow your loaf of bread to cool before slicing it.
Note:
For an even softer bread, add more oil to the recipe, skip the first resting time, and bake your loaf of bread at the least time possible.

Coca-Cola bread
If you enjoy super soft loaves of bread, then you will absolutely fall in love with this Coca-Cola bread recipe. Just take one bite, and you'll be hooked! I know without a doubt that I am. Today I am using my bread machine, but you can also make it by hand. Just let the dough rest for an hour after mixing it by hand. (I will leave my step-by-step instructions for both below.)
Ingredients:
•3-3/4 cups of all-purpose flour
•1 teaspoon of Splenda or sugar
•2-1/4 teaspoons of rapid yeast
•2 mini-sized (7.5-ounce) cans of Diet Coke or regular Coca-Cola
•1 teaspoon of seasoning salt (I used Mrs. Dash).
•3 tablespoons of canola oil for the dough, plus a little more if you're making the dough by hand to be used for greasing the bread pan.
•2 tablespoons of melted butter to brush over the dough when baking it in the oven.
Instructions for making the bread in a bread machine:
First, in your bread machine pan, add the flour, yeast, Splenda or sugar, seasoning salt, canola oil, and two mini Diet Cokes or regular Coca-Colas.
Shut the lid on your bread machine.
Press the button for basic bread. On my machine, it's number one. Allow the machine to mix the dough and bake it. I wanted my loaf of bread to be cooked lightly, so I also made sure that was set.
Instructions for making the bread by hand:
Add 3-3/4 cups of all-purpose flour, 1 teaspoon of Splenda or sugar, 2-1/4 teaspoons of rapid yeast, 2 mini-sized (7.5-ounce) cans of Diet Coke or regular Coca-Cola, 1 teaspoon of seasoning salt (I used Mrs. Dash), and 3 tablespoons of canola oil together in a large bowl.
Knead the dough, then brush it with canola oil. Cover the bowl with plastic wrap and allow the dough to rest for one hour.
Punch the dough down and place it into a greased bread pan. Allow the dough to rest again for another 30 minutes.
After the second rest, melt two tablespoons of butter and brush it on the top of the dough.
Bake the bread for 30 to 35 minutes in a 350-degree oven. Allow your bread to cool. Then slice it and enjoy!
Instructions for braided dough:
After the first rest, cut the dough in half. Now cut the halves into thirds. Roll each piece of dough out into long rope shapes.
Now, lay each piece of rolled-out dough side by side. Connect all the pieces at one end by pinching them together. Then French-braid the dough. Once you get the dough braided, pinch the end in just as you did the top part of the dough.
Place the dough on a baking stone or a greased cooking tray. Allow the dough to rest again for another 30 minutes.
Melt two tablespoons of butter and brush it on the top of the dough, or if you prefer, use an egg wash instead.
Bake the bread for 30 to 35 minutes in a 350-degree oven. Allow your bread to cool. Then slice it and enjoy!

Cherokee Indian fried bread
This morning, I felt like going back to my roots and making homemade Cherokee fried bread. When I was a little girl, my great-grandmother (who was Cherokee Indian) taught me how to make simple, but oh so delicious Cherokee fried bread, while she'd tell me about the hardships my ancestors went through while walking the Trail of Tears (American Indian removal that began in 1831, ended in 1850). Many American Indians suffered from hunger, disease, and brutality. The Tribes were given minimum government provisions (white flour, salt, and lard) and they had to learn how to make the most from what they were given, while rationing the provisions to survive. I was told that it was during this gut wrenching journey that my Cherokee ancestors learned how to make fried bread. It's not considered being the healthiest bread ever made, but it is a traditional survival bread recipe that dates back to the Trail of Tears.
Traditionally, great-grandma used 3 cups of all-purpose flour, 1-½ teaspoons of baking powder, and a pinch of added salt, but I am using self-rising flour because it already has those ingredients added in.
This recipe will make eight small pieces of fried bread, or four large pieces. It can be made into round biscuit shapes, or into flat bread. The ingredients for both recipes are absolutely the same.
Ingredients:
•3 cups of self-rising flour
•1 cup warm water
•Lard, for frying, instead of using traditional lard, you can also use bacon grease (I used about 1-¼ cups)
Instructions:
In a bowl, add the flour with one cup of warm water; mix until the flour is combined well and a dough ball forms. Cover the dough with a damp tea towel and let the dough rest for thirty minutes.
While the dough finishes its rest, add the lard, or cooking oil to a skillet. (The oil will need to be about two inches deep inside the pan.) Allow the grease to get piping hot over medium-high heat.
Form round balls with the dough in the palms of your hands, flattening them somewhat. Transfer the formed dough into the hot oil. Fry until the bottoms are golden brown, then flip the bread over and brown on the other side. (Place a lid over your skillet while cooking.) Fry both sides of the bread for about five minutes each.
Serve with maple syrup, honey, with fruit, or with gravy. Enjoy!
Note:
To make Cherokee flat bread for Cherokee tacos, use the same ingredients and the exact amount as in the above recipe, then completely flatten the dough balls out. Fry in a skillet of hot oil, flip once the underside of the flat bread is golden brown and finish cooking.
Add a spoonful of cooked pinto beans, shredded lettuce, and diced tomato in the center of the flat bread, then fold the flat bread in a taco shape. Serve and enjoy!

One hour dinner rolls
Creating great bread doesn't have to be an all day, all night process. In fact, fresh dinner rolls can be made in just one hour. Today, allow me to walk you through the simple steps to find out how I prepare my simple one hour yeast dinner rolls.
Ingredients:
•3 cups of bread flour, sifted
•¼ cup of Splenda, or sugar
•2-¼ teaspoons of active yeast, or 1 package of rapid rise yeast
•½ cup of warm water
•2 tablespoons of semi-melted butter
•⅓ cup of milk
•1 teaspoon of seasoning salt
•2 tablespoons of canola oil, to roll the dough ball in before its rise
Instructions:
In a bowl, add the flour, Splenda, or sugar; stir. Then make a well in the center of the flour mixture, add your yeast, and warm water inside the well. Allow the mixture to sit for five minutes. At this point, you should start seeing the active yeast blooming in the water (bubbles forming).
Now, add two tablespoons of melted butter (slowly) and ⅓ cup of milk. Mix well. Knead the dough for just a few minutes until it forms a ball-shaped dough and all the ingredients are combined well.
Add two tablespoons of canola oil inside your bowl of dough and roll the dough around in the oil (to coat it). Place a lid or tea towel over your dough. Allow your dough to rest for thirty minutes.
The dough will not completely double in its size, but it will change its form during this stage.
Next, lightly butter your hands and a baking tray. Pinch the dough into golf ball-sized shapes and transfer them to the prepared pan. (Spacing them apart at least by one inch.) Bake your rolls for about twelve to fifteen minutes inside a 350 degrees F oven. During the last few minutes of baking, brush the tops of your rolls with melted butter.
Serve with stew, chili, gravy, or slice your rolls open and make mini sandwiches. Enjoy!
Note:
If you want your dough to double and become lighter in its texture, allow the dough to rest for two hours. Then shape your rolls and allow them to rest once again in a warm place for twenty-five minutes. After that, bake them.

Sandwich bread
Want to make a sandwich, but you're out of bread? No problem! This recipe makes a loaf of bread that's perfect to slice thinly for sandwiches.
Ingredients:
•3 cups of all-purpose flour
•1-¼ teaspoon of yeast
•1 teaspoon of seasoning salt, or kosher salt
•1-½ teaspoons of Splenda, or regular granulated sugar
•1-½ cups of lukewarm water, plus a little more if needed
•2 teaspoons of canola oil
•2-3 tablespoons of melted butter, to be brushed over the top of the dough
Instructions:
In a bowl, add your flour and yeast; stir well. Then add the seasoning salt, or kosher salt, and Splenda, or sugar. Then whisk the dry ingredients together.
Now, add one and a half cups of lukewarm water and two teaspoons of canola oil to your flour mixture and incorporate well. Use your hands if needed.
Cover and allow the dough to rest in a warm area for one hour.
Now, punch the dough down. Then allow it to rest for thirty-five minutes.
Next, take the dough and work it with your hands. Do this for just a couple of minutes. (Don't knead it, just pull the dough and tuck it under. Then shape it to the size of your pan.)
Using cooking spray, spray the inside of a loaf pan. Transfer your prepared dough to the pan. Brush the top of the dough with melted butter. Cover and allow the dough to rest again for at least another hour.
Transfer your pan to a 375 degrees F oven and bake anywhere from thirty-five to forty-five minutes. Watch over your bread during the last fifteen minutes. Brush the top of your bread with melted butter. Cover your bread loosely with aluminum foil if needed.
If you're using a Pullman pan, don't forget to grease underneath the lid. This prevents the dough from sticking to the top of it.
Allow your loaf of bread to cool before slicing it.
Note:
For an even softer bread, add more oil to the recipe, skip the first resting time, and bake your loaf of bread at the least time possible.

Country-style English muffin bread
If you like homemade English muffins, you'll really enjoy this English muffin bread. It's so much fun to make and tastes just like English muffins. You can slice the bread as thinly or as thickly as you like. It's great to use for breakfast sandwiches and BLTs.
Ingredients:
•3 cups of all-purpose flour
•1 tablespoon Splenda or sugar
•1-1/2 teaspoons seasoning salt
•1/4 teaspoon baking soda
•1 tablespoon of rapid-rise yeast
•1 cup of oat milk
•1/4 cup of water
•2 tablespoons of canola oil
•1-2 tablespoons of cornmeal to sprinkle inside the bread pan and over the bread dough right before baking
•2 tablespoons of butter to grease the bread pan plus 1 tablespoon of melted butter to brush on the top of the dough
Instructions:
For best results, use a bread cylinder baking pan.
First, sift the flour four times before using it. Set aside.
In a pan, heat 1 cup of oat milk and 1/4 cup of water over low heat until it becomes lukewarm. Then remove the pan from the burner. Add the yeast and allow it to sit for a couple of minutes.
Now, add the prepared milk mixture to a large bowl and add the sifted flour, 1 tablespoon Splenda or sugar, 1-1/2 teaspoons seasoning salt, 1/4 teaspoon baking soda, and 1 tablespoon of rapid-rise instant yeast. Combine well.
Knead the dough with your hands for about eight to ten minutes, or until it comes together well. The dough should not be very sticky at this point, but if it is, add more flour.
Grease your bread pan with butter. For this recipe, I use a stainless steel bread cylinder baking pan. If you don't have a pan like this, use whatever you have, but preferably aim for a skinnier pan. If you don't mind what shape your English muffin bread is, by all means use a regular-sized bread pan.
Sprinkle 1 tablespoon of cornmeal inside the greased pan. Tilt the pan from side to side and turn it while it's tilted to make sure the cornmeal is evenly distributed on the inside of the pan.
Next, place your dough inside the prepared pan. Then sprinkle the top of the dough with cornmeal. Cover the pan. Allow your dough to rest in a warm place for about an hour.
Bake in a 375-degree oven for 35-45 minutes. Flick the bread with your finger to check for doneness. Your bread will sound hollow inside when it's fully baked.
Allow your English muffin bread to cool, then slice it as thin or as thick as you want. Serve and enjoy!
Note:
Tin cans can also be used in a pinch; just make sure that you take the paper off the outside of the cans and half your dough. Grease your tin cans well. Then fill the cans half-full.
If you haven't already checked out my article on Newsbreak where I made my English muffin casserole, please do because it's really yummy too.

Grits cornbread
This particular grits cornbread recipe will make a very flavorful and fluffy pan of bread. It rises nicely and browns beautifully like a typical cornbread made from store-bought cornmeal. The texture of the cornbread will be slightly different, but the quality and taste are still really good.
What are grits?
Grits are created from ground white and yellow corn. Both grits and cornmeal are created from dried ground field corn (also known as dent corn).
Field corn is left on the stalk to dry completely before it's harvested. After that, the dried corn goes to mills where it's then processed for numerous consumer products such as grits and cornmeal.
Now, let's get to my recipe!
Ingredients:
•¾ cup of quick-cooking grits
•1¼ cups of granulated Splenda, or regular granulated sugar (add less if you don't like sweet cornbread)
•1¾ cup of self-rising flour
•½ cup of canola oil
•1 cup of milk
•¼ cup of unsweetened applesauce, or 1 egg (I used unsweetened applesauce)
Instructions:
In a bowl, add all the list of ingredients together. Stir and combine well.
Grease a pan or cast-iron skillet, then pour your cornbread batter inside your prepared pan.
Bake in a 425 degrees F oven for twenty-five minutes or until the bread is golden on top and pulls away at the sides of the pan.
Slice and serve.
Note:
For my grits cornbread recipe, you can use any type of grits, but if you choose to use really coarse grits, you'll probably want to run them through a food processor, or a blender first, to create a finer textured cornmeal.

Country-style no-knead bread
Needing bread for dinner tonight? You can start making this bread dough before breakfast and actually have a fresh loaf of bread by lunchtime. It's just that simple. This bread will not be like a typical loaf of sandwich bread. Instead, it's country-style and rustic. It's great served with stew, beans, dumplings, etc.. But that's not to say that you can't slice it to make yourself a meatloaf sandwich.
This bread dough is super forgiving, as long as you do not place it inside the refrigerator to rise. I started my dough at 6:30 a.m. this morning and it will be done with its first rest around 9:30 a.m.. Afterward, I will take the dough out of the bowl and shape it, but I will never knead it. While shaping the dough, I will roll it around in a flour cornmeal mixture (to coat the outside dough). Then, after that, I will place the bread dough back into the bowl and let it rest again.
At this point is where it doesn't really matter how long you let your dough rest. You can allow it to rest an hour, two hours, three hours, and so on. As long as you keep it covered and never put the dough in the refrigerator.
Before baking your bread, make sure you preheat your dutch oven with a metal lid (no plastic handles) over the top of the pan. If you don't have a metal lid, use aluminum foil to cover the pan. This step is very important, so don't skip it.
I brush an egg wash over my bread before baking it. However, this step is optional.
Now, to my recipe!
Ingredients:
•3-½ cups of flour
•1 teaspoon of yeast
•1 teaspoon of seasoning salt (I use seasoning salt to give the bread more flavor)
•1-½ cups of hot water (not boiling)
•2 extra tablespoons of flour mixed with one tablespoon of white cornmeal (to roll the dough in after the dough has rested the first time)
•1 egg whisked with 1 teaspoon of water for the egg wash (to be brushed over the dough right before baking it)
•Small amount of oil to pour into the hot dutch oven (be extra careful when doing this step). I use about 1 teaspoon.
Instructions:
In a large bowl, add your flour and seasoning salt; stir well. Now, add the yeast and stir well again. Then add the hot water; mix the dough with a wooden spoon or a spatula.
Place plastic wrap over the top of the bowl. Let the dough rest for at least three hours in a warm place. Then take the dough out of the bowl and roll it around in two tablespoons of flour mixed with one tablespoon of white cornmeal. Don't knead it! Transform your dough into a round shape and transfer it back into the bowl. Cover the dough once again, allowing it to rest another hour.
In a small bowl, add the egg and teaspoon of water to make the egg wash; whisk and set aside.
Now, place your dutch oven in the 450 degree F preheated oven, allowing the pan to get super hot with a metal lid over the top.
Next, very carefully take the hot pan out of the oven; add a small amount of oil to the inside of your pan. Then transfer the bread dough to the dutch oven.
Now, brush the top of your dough with the egg wash and place the lid back on; bake for thirty-five minutes. Then take the lid off and bake the bread for about another ten minutes.
Allow the bread to cool, then wrap it in plastic wrap or aluminum foil, or serve your beautiful loaf of warm bread while it's fresh.

Brown sugar bread
This recipe will make two medium-sized loaves of delicious brown sugar bread. I used all-purpose flour, but you can use white whole wheat flour as a substitute. You can also add additional ingredients to the dough if you desire, at any time before baking the loaves. Add-ins can include the following ingredients: cinnamon, chocolate chips, nuts, oats, or fruit.
Ingredients:
•1 cup of brown Splenda or regular brown sugar (light or dark brown sugar both work)
•5 cups of all-purpose flour (plus additional if it's needed)
•2 tablespoons of active dry yeast
•2 cups of lukewarm water
•½ cup of whole milk
•2 tablespoons of canola oil
•1 teaspoon of kosher salt
Instructions:
In a bowl, add the brown Splenda or brown sugar, flour, and yeast together. Stir well.
Now, add the water, milk, canola oil, and kosher salt to the flour mixture. Combine thoroughly and knead the dough until it comes together into a smooth ball shape. Then cover the dough with a tea towel. Allow your dough to rest for approximately one hour.
Next, grease two 1-pound loaf pans and use half the dough for each pan, or transfer all the dough to a 2-pound bread pan. (I used two oval-shaped pans.)
Bake for about fifty minutes up to one hour (depending on how brown you prefer your bread) in a 350 degrees F oven.
Take your loaves of sweet bread out of the pan and allow them to cool before slicing. Serve and enjoy!

Pullman cheese and pepperoni bread
This loaf of bread is filled with chunks of pepperoni and gooey shredded cheese. It's wonderful served with various pasta dishes or for a snack just by itself and when it's dipped in pizza sauce, it's even better! My husband enjoys eating a slice just as soon as it's cool enough to serve. Are you guys ready to put some mouthwatering yum into your tums?
Ingredients:
•3 cups of all-purpose flour
•1-¼ teaspoon of yeast
•1 teaspoon of seasoning salt, or kosher salt
•1 cup of shredded cheese, your preferred (I used shredded cheddar.)
•1 cup of chopped pepperoni
•½ teaspoon of garlic powder (optional)
•½ teaspoon of Italian seasoning (optional)
•1-½ cups of lukewarm water, plus a little more if needed
•2-3 tablespoons of melted butter, to be brushed over the top of the dough
Instructions:
First, chop the pepperoni and shred one cup of your favorite cheese. (Chop your pepperoni into the size you prefer.)
In a bowl, add the list of ingredients. (Slowly add the water, while you are bringing the dough together. You may need less or more.) Mix by hand for about one minute just until the dough comes together.
Then cover the dough with a clean towel, or use a piece of plastic wrap. Allow the dough to rest for one hour in a warm area. (This bread dough isn't supposed to be too wet, but it does need to be somewhat moist after it comes together.)
Now, punch the dough down with your fist and smooth it out into a well-rounded ball shape. Brush the dough with melted butter. Cover the dough again and allow it to rest for thirty minutes.
Next, prepare your bread pan by greasing it with butter, margarine, or vegetable shortening.
Transfer the dough to your prepared loaf pan and cover it. Allow your dough to rest in the pan for up to three hours.
Today, I decided to use a one pound Pullman loaf pan. I will not be removing the lid until after my bread is finished baking. If you're using a Pullman loaf pan, make sure you grease underneath the lid and brush the top of your dough with melted butter before sliding the lid onto the pan.
Bake (covered) in a 375 degrees F oven for thirty to forty-five minutes. (I will allow my loaf to bake for the full forty-five minutes.)
When your bread is finished baking, transfer it to a wire cooling rack. Allow it to cool before slicing it. Then enjoy it!
Please, make sure to wrap the remaining loaf tightly in plastic wrap or aluminum foil and store it inside the refrigerator. The bread will ruin if you don't.
Note:
If you'd like, you can add various types of grains and nuts when first mixing the dough. Just remember to adjust the amount of flour and water too. For example: if you want to add a grain such as oatmeal, add a half of a cup of uncooked oats, and use two and a half cups of flour, instead of the three cups.
If you prefer to use a hard grain, soak the grain first for at least ten hours before adding it to your dough. Add the grain in during the time that you add the other ingredients. Then mix your dough. (It's actually best to allow the grain to soak in water overnight.)

Savory Italian cheddar bread
This is the perfect bread to serve alongside any of your favorite pasta dishes. It's truly yummy! To create the savory Italian cheddar bread, I add shredded cheddar cheese and Italian seasoning to my dough before the dough's ten hour rest.
Ingredients:
•2 cups of all-purpose flour
•1 cup of whole-wheat flour
•1 teaspoon of seasoning salt
•¼ teaspoon of active dry yeast
•1 teaspoon of Italian seasoning
•1-½ cups of warm water, add more if needed
•1-½ cups of shredded Cheddar cheese
Instructions:
In a large mixing bowl, combine the all-purpose flour, whole-wheat flour, and add the yeast. Stir well. Then add the Italian seasoning and the seasoning salt; stir until all the ingredients are incorporated well.
Now, add the warm water to the flour mixture; combine with a wooden spoon. Sprinkle shredded cheddar cheese into the dough mixture. Combine well until the dough comes together.
Cover the bowl of dough with a clean towel or plastic wrap and allow the dough to rest for ten hours.
Place your Dutch oven inside a 450 degrees F oven. Allow it to get sizzling hot with the lid on. (Please make sure that your lid handle isn't plastic.)
Now, sprinkle flour over the dough while it's inside the mixing bowl. Tuck and fold your dough into a round shape.
Carefully remove the Dutch oven from your preheated oven and transfer your dough to the inside of the Dutch oven.
Place the lid on your Dutch oven and bake your bread dough for about forty-five minutes. Then remove the lid, add extra shredded cheddar cheese on top of your bread, or brush the top of your bread with olive oil. Place your Dutch oven back into the oven. Bake for another ten to fifteen minutes, or until the bread is browned according to your preference.
Next, remove your pan from the oven. Flip your bread out of it and let it cool. Slice and enjoy it!

No knead loaf bread
There's no need to knead this dough. So, skip the bread aisle because you can create your own delicious fresh loaf of bread right in your own kitchen.
I simply love making homemade bread, and this is another one of my favorites. It takes about five minutes to whip up the dough, then another five hours to allow the dough to rest and double. As stated above, there's no kneading involved. Plus, this is another very forgiving dough. So, don't worry if you get busy and forget that the dough is resting on the counter. Should that occur, don't throw your dough out. Just simply continue following the rest of the instructions. Your bread will turn out delicious!
Ingredients:
•3 cups of all-purpose, or bread flour
•2 teaspoons of yeast, or 1 package of instant rapid rise yeast
•2 teaspoons Splenda, or sugar
•1-¼ teaspoons of seasoning salt
•1-½ cups of warm water
•Butter to grease the pan
Instructions:
In a bowl, combine the flour, yeast, Splenda, or sugar and stir. Now, add the seasoning salt. Blend well with a spatula, or wooden spoon. Slowly add the water and stir well.
Cover the bowl with a clean tea towel. Place the dough in a warm place and allow it to rest for four hours.
Grease an 8×4-inch loaf pan with butter; set aside.
Dust your countertop, or workspace with flour and transfer your dough to it. Dust your hands with flour and begin shaping the dough into a rectangle, but do not knead the dough.
Transfer your dough into the prepared pan.
Cover the dough with a clean tea towel, and set in a warm place for one hour. The dough will double in size. (If after one hour it hasn't, allow more time. Sometimes the weather affects how long the dough needs to rest.)
Bake for about twenty-five to thirty minutes in a 375 degrees F oven.
Next, once your loaf of bread has finished baking, take it out of the bread pan. Allowing it to cool on top of a wire rack. Slice once your loaf of bread has cooled.

Homemade garlic bread
As y'all know I make different types of homemade bread often. This garlic bread (toast) is made from my Country-style no-knead bread. I bake the bread, then cut thick slices from the round-shaped loaf to create amazing garlic bread. It's the perfect bread to serve alongside Italian cuisine.
Ingredients:
•4 thick slices of my Country-style no-knead bread
•4 heaping teaspoons of butter
•4-6 cloves of fresh garlic minced, or diced
Instructions:
After you have baked the bread and it has cooled, cut four thick slices of the bread and smear each one with butter.
Now, mince or dice the cloves of garlic and sprinkle it onto the top of each buttered piece of bread.
Place the bread on top of a wire rack, with a pan underneath. Transfer the pan to a 375 degrees F oven and bake for about ten to fifteen minutes, or until your garlic bread is golden brown around the edges.
Serve your garlic bread with your favorite pasta dish and enjoy yourself!
Note:
If you don't have the time to bake homemade bread, you can purchase a loaf of French bread to create a nice loaf of garlic bread too.
To make garlic bread from French bread
Ingredients:
•1 loaf of French bread
•½ cup of butter, softened
•6 cloves of minced garlic, or diced
•1 teaspoon of fresh chives, chopped
Instructions:
Slice the loaf of bread down the center. Set aside.
In a dish, add the softened butter, minced garlic, and fresh chopped chives. Stir and mix well.
Now, using a spatula, spread the garlic butter mixture evenly inside the center of the bread.
Next, wrap your loaf of bread with a large sheet of aluminum foil. Transfer the loaf of bread to a 350 degrees F oven; bake for about fifteen minutes.

Quick bread
Why wait hours for yeast dough to rest when you can make a nice, yummy loaf of bread in less than forty-five minutes? Making delicious homemade bread doesn't need to take forever, and with this recipe, it doesn't! Today, let me show you how I create a gorgeous loaf of quick bread in less than forty-five minutes!
So, to make this bread, you only need two ingredients, plus butter or cooking spray for greasing your loaf pan. This bread is one of the simplest recipes to create, and I hope that y'all will enjoy it!

Ingredients:
3 cups of self-rising flour
2-1/4 cups of milk
Butter or cooking spray for greasing your bread pan
Instructions:

In a bowl, add 3 cups of self-rising flour. Slowly pour in 2-1/4 cups of milk and stir with a wooden spoon or spatula. Be careful not to overmix your dough because it will create a tough loaf of bread. This will be a wet dough, but not overly runny. Follow my photos as a guide. You may need to use less milk than what I used today. (So, pour the milk in gradually.)

Grease your loaf pan with butter, vegetable shortening, or cooking spray. Then spoon the wet dough into the prepared pan.
Transfer your bread pan to a 350 Degrees F oven and bake for about 35 minutes, or until your bread is browned to your preference.

Turn your loaf of bread out of the pan and place it on a cooling rack. Allow your bread to cool before slicing it.

Homemade country-style cheese bread
To make my delicious cheese bread, first you'll need to follow my list of ingredients and instructions that go along with my country-style no-knead bread. No worries, I will do a recap for creating the dough again here in this article since it's the main dough recipe that I used to make my scrumptious country-style cheese bread.
The Dutch oven that I prefer to use to prepare my rustic round bread is well loved. I was told that it was an 1851 vintage enamelware Dutch oven manufactured by Asta Fissler, Amsterdam, Germany. From measuring the dutch oven, it appears to be just under 3 quarts and it's 10 inches across in diameter.
Here are the country-style no-knead dough ingredients for a recap:
These are the ingredients you'll need to start the dough.
•3-½ cups of flour
•1 teaspoon of yeast
•1 teaspoon of seasoning salt (I use seasoning salt to give the bread more flavor)
•1-½ cups of hot water (not boiling)
•2 extra tablespoons of flour mixed with one tablespoon of white cornmeal (to roll the dough in after the dough has rested the first time)
•Originally, I applied an egg wash to brush over the dough right before baking it, but for my country-style cheese bread I don't do this step.
•Small amount of oil to pour into the hot dutch oven (be extra careful when doing this step).
Ingredients to finish the bread:
•1-½ cups of grated parmesan cheese
•1 teaspoon of garlic powder
•1 tablespoon of onion powder
•1-2 tablespoons of canola oil
•2-4 tablespoons of melted butter (to brush over the bread within the last ten minutes of baking)
In a large bowl, add 3-½ cups of flour and seasoning salt; combine well. (I use self-rising flour.)
Now, add the yeast; stir well. Then add 1-½ cups of hot water; mix the dough with a spatula, or a wooden spoon.
Place plastic wrap over the top of the bowl. Allow the dough to rest for at least three hours in a warm place.
Now, take the dough out of the bowl and roll it gently around in two tablespoons of flour mixed with one tablespoon of white cornmeal. Don't knead the dough!
Shape your dough into a round dough ball; transfer it back into the bowl. Cover the dough once again, allow it to rest another hour.
Now, place your dutch oven in the 450 degree F preheated oven, allowing the pan to get extremely hot with a metal lid over the top. Don't use a lid with plastic handles. If needed, use aluminum foil to cover your pan.
Now that you've done all of that, below you'll find the list of ingredients and remaining instructions that you'll need to follow along to finish creating your own delicious homemade country-style cheese bread.
Ingredients to finish the bread as a recap:
•1-½ cups of grated parmesan cheese
•1 teaspoon of garlic powder
•1 tablespoon of onion powder
•1-2 tablespoons of canola oil
•2-4 tablespoons of melted butter (to brush over the bread within the last ten minutes of baking)
Instructions to finish the country-style cheese bread:
Add the Parmesan cheese, onion powder, and garlic powder to your work surface; mix the ingredients together with your fingertips.
Now, toss your bread dough gently on the parmesan cheese, onion powder, and garlic powder into the dough. Do this by gently rolling the dough around in the cheese mixture (coating the outside of the bread). Only add these ingredients once the dough has gone through both of the resting stages and the gluten is well developed. Do not knead your dough at any time.
Next, carefully take the hot pan out of the oven; add a small amount of oil to the inside of your pan. Transfer the dough inside the dutch oven. Dizzle a slight amount of oil over the top of the dough.
Now, place the lid back on; bake for thirty-five minutes. Then take the lid off and brush the melted butter over the top. Bake the bread for another ten minutes.
Take the bread out of the Dutch oven and allow it to cool on a wire cooling rack. Once your bread has cooled, slice it, then wrap it up in plastic wrap or aluminum foil. Enjoy!

Sun bread
It's another day for another loaf of delicious bread. Today, I want to share a vintage family recipe with you guys. It's a really fun recipe to make during the summer. The bread dough is made, then taken outside and left to rest in the sun. It will need to rise two times before it's baked. The traditional method for cooking the sun bread is over a fire, either on a stone and fire grate or in a greased cast-iron skillet or greased cast-iron Dutch oven with a lid. However, today I will be using a loaf pan and baking mine inside. See my endnotes for further instructions if you prefer cooking your sun bread the traditional way outside.

Ingredients:
3 cups of all-purpose flour, plus 2 tablespoons
1 package of dry active yeast
1-1/2 teaspoons of fine granulated sugar; I substitute this with Splenda.
1 tablespoon of bacon grease or vegetable shortening, melted, for preparing the dough. Plus 1 tablespoon of bacon grease or vegetable shortening, melted, to grease the dough bowl, dough, and bread pan or pans.
1 cup of warm water, plus a little extra if your dough is too dry. Don't add too much because this isn't supposed to be wet dough.
1 small pinch of salt; here I like to use seasoning salt to add flavor.
To make two loaves of bread, you'll need the following ingredients:
6 cups of all-purpose flour, plus 4 tablespoons
2 packages of dry active yeast
3 tablespoons of fine granulated sugar; I substitute this with Splenda.
2 tablespoons of bacon grease or vegetable shortening, melted, for preparing the dough. Plus 2 tablespoons of bacon grease or vegetable shortening, melted, to grease the dough bowl, dough, and bread pan or pans.
2 cups of warm water, plus a little extra if your dough is too dry. Don't add too much because this isn't supposed to be wet dough.
1 small pinch of salt; here I like to use seasoning salt to add flavor.
Instructions for one loaf of bread:
Note:
To double the dough, follow the same instructions below; just make sure you follow the amounts listed above for two loaves. For example, when it says to add 1 package of yeast, you'll need to add 2 packages of yeast, etc.
In a large bowl, combine 1 package of yeast with 2 cups of all-purpose flour.
Melt 1 tablespoon of bacon grease or vegetable shortening over the stovetop in a small pan. You can use a microwave for convenience. If you want to melt both tablespoons now, you can. Just make sure that you measure out 1 tablespoon for the dough.
Now, add 1 cup of warm water, 1 tablespoon of melted vegetable shortening, Splenda (or regular granulated sugar), and salt or seasoning salt to the flour mixture. Mix thoroughly until all ingredients are well incorporated.
Next, add the remaining all-purpose flour and knead the dough in the bowl until it becomes soft and smooth.

Grease the bowl with melted bacon grease or vegetable shortening, and roll the dough around in the oil just to cover the outside of the dough. Do not knead the dough anymore.
Cover the bowl with plastic wrap and let it rise outside in the sun. Preferably in a warm place where it won't be disturbed. I am using a 1-gallon bowl with a lid today.
Allow the dough to rest for at least one hour or until it's doubled in size. It's best if you can let it rise for 6 hours outside and directly under the sun.
After the dough has risen, divide it according to the size of the bread pan or pans that you prefer to use.

Next, grease the pan or pans and transfer the dough. Then let the dough rest for another hour inside the pan or pans outside in the sun, if possible. Today I am making the recipe for one loaf of bread, and I will be baking my bread in a loaf pan in the oven. The exact size of my pan is 8.27 inches in length, 4.53 inches wide, and 4.33 inches deep.
So, I will grease my pan, then transfer my bread dough into the prepared pan and allow the dough to rise again outside in the sun for at least one more hour.
As stated earlier, I will be baking my loaf of bread inside today. To do this, you'll need to bake the bread in the oven at 350 degrees for about 45 minutes, or until the bread has browned to your preference. Once the bread is done, it will sound hollow when you tap the top of it with your fingers.
Note:
The traditional method for cooking the sun bread is over a fire, either on a stone and grate or in a greased cast-iron skillet or greased cast-iron Dutch oven.
If you prefer using a cast-iron Dutch oven with the fire method, make sure that you also place hot coals over the top of the lid while you're cooking the bread. Use long cooking tongs to do this. This will ensure that the bread cooks evenly and browns well on top.
The time will vary when the bread is cooked outside over a fire. If you're using a cast-iron skillet, the bread will need to be flipped to brown the top.

Butter crusted bread
Today, I am making my Boule (round) butter crusted bread. This bread is baked inside a 375 degrees F oven, inside a cast-iron skillet. It can also be baked inside a Dutch oven, on a baking stone, or in a loaf pan. Use whatever works best for you and your occasion.
This is a wonderful bread to serve with beans, stews, soups, and chili. When the dough is baked inside a loaf pan the bread makes a very flavorful sandwich bread. The dough is versatile and it can be formed to whatever shape you prefer.
Ingredients:
•1-½ cups of warm water
•¼ cup of Splenda, or regular sugar
•2-¼ teaspoons of active-dry yeast
•2 tablespoons of butter, melted, plus extra for brushing over the top of the dough
•4 cups of bread flour, or all-purpose
•1-½ teaspoons of seasoning salt
Instructions:
In an extra large bowl, add the warm water, Splenda, or regular sugar, and yeast; stir.
Once your yeast proofs, add your flour, melted butter, and seasoning salt. Combine with a wooden spoon. (I generally end up using my hands to form my dough into a ball shape.) You can use a stand-up mixer, with a dough hook attachment if you prefer.
Lightly drizzle oil over your dough and leave it inside the bowl and cover with a tea towel, or plastic wrap. Allow your dough to rise for thirty minutes.
After the first rest, lightly flour a work surface and transfer your dough to it. Roll your dough around in the flour (by hand) a few times and knead it for approximately five to six times. Then shape it into a ball. Cover your dough with a tea towel, or plastic wrap once again. Allow the dough to rest for another thirty minutes.
From this point onward, I will be preparing my largest cast-iron skillet to make my bread, but you can use regular loaf pans, a Dutch oven, etc.. However, if you're using a loaf pan, skip the next step.
Place a cast-iron skillet in a 400 degrees F oven and allow it to get super hot. Then turn the temperature down to 375 degrees F. Then take the skillet out of the oven and brush your cast-iron skillet with melted butter. Transfer the dough to the cast-iron skillet. (Be careful not to burn yourself with the hot skillet.)
Bake in the oven for twenty-five to thirty-five minutes at 375 degrees F. Towards the end of the baking time, brush your bread with additional melted butter. (I also brush extra butter over the bread midway through baking.)
Allow your fresh butter-crusted bread to cool. Enjoy!
Note: After you brush the dough with melted butter, you can sprinkle sesame seeds, flax seeds, parmesan cheese, sea salt, etc. on top of it. Then bake.

Homemade bread from sourdough starter
Today, I wanted to share one of my favorite bread recipes that uses part of the starter. When I make homemade bread, I usually always brush my bread dough with an egg wash, or melted butter. For this specific bread recipe, I prefer to use the egg wash, but either works great. However, if you prefer a buttery crust, you'll want to use melted butter.
Ingredients:
•¾ cup of active sourdough starter
•½ cup of warm water, maybe a little extra if dough isn't pliable enough
•½ cup of canola oil
•2 cups of bread flour
•1 teaspoon of salt
•Fine ground white cornmeal, for dusting (optional)
•1 egg and 1 tablespoon of water for egg wash (optional)
To make the dough:
Whisk the starter, canola oil, and water together in a large bowl. Next, add in the flour and salt. The dough will feel dry at this point and that's fine. Cover the bowl with plastic wrap. Now let the dough rest for one hour.
After the hour has passed, work the dough vigorously with your hands, for about a minute. Shape the dough into a ball. Now, spray the ball of dough with cooking spray, or use cool, melted butter and cover the bowl with plastic wrap. Let the dough rest in a warm place. Allowing it to rise (until it's doubled in size) for about one hour.
Punch the dough down, then let it rise one last time for anywhere from 3-4 hours. The dough can set overnight if you prefer waiting.
Next, preheat the oven to 350 degrees F, and prepare your loaf pan, or dutch oven with spray oil. Work the dough again by hand, until it's smooth and pliable. Dust the dough with fine white cornmeal (optional). Place the dough in the prepared pan.
Now, add the egg and one tablespoon of water; whisk and brush the egg wash over the top of your bread. Doing this helps the loaf of bread to brown beautifully and adds a nice sheen to the crust. (Another option is to brush melted butter over the top of the dough before baking it.)
Bake until the top of the loaf is golden brown. The loaf of bread usually takes about thirty-five minutes to bake.
What's the difference between using egg wash and butter when baking bread?
When making homemade bread, brushing an egg wash over your dough before baking will give you a perfect crunchier crust. It also helps brown the outside of the bread while it's baking. The egg wash will also keep the bread tender on the inside of the loaf. Plus, it will also make your bread's appearance glossy and give it a beautiful sheen after it's baked.
Using melted butter makes the bread have a delicious buttery taste. The butter melts down into the bread dough while it's baking, which in turn also creates a very tender loaf of bread. Plus, it tends to help bread rise higher. Using butter will brown the outside loaf almost in the same way as if you used the egg wash. However, if you choose to use melted butter, the bread will not have a glossy shine after it's been baked. You can brush the loaf with melted butter again once it's baked, but your bread will become a bit greasy.
Note:
You can use this dough also to create dinner rolls, hot dog buns, hamburger buns, and sub-buns.
Don't over bake your bread. Over-baking will create a hard, thick, chewy crust. To help ensure that the crust won't get overdone, you can cover your bread pan with aluminum foil before baking, but take the foil off during the last ten to fifteen minutes; then continue baking.
Give the top of your bread a test to check for doneness, simply by giving it a thump with your finger. If the bread sounds hollow, it's done. You can also check for doneness with a baking thermometer. The internal temperature of your bread should read 200 degrees F when it's done.

Bread dough made in a bag
Creating dough inside a bag is less messy than making it in a bowl, and it's genuinely a lot of fun to prepare dough for bread in this fashion. Once the dough has gone through all its stages, I merely take it out of the bag, then place it inside a well-buttered pan. The dough will finish its last rest in the greased pan and then get baked. As for the bag? I just toss it into the trash.
This dough can be used to make several types of bread and can even be used as pizza dough, garlic sticks, rolls, etc..
Ingredients:
You'll need a clean one gallon plastic bag or bigger. (Nothing smaller than one gallon.)
•1-½ cups of warm water
•¼ cup of Splenda, or regular sugar
•2-¼ teaspoons of active-dry yeast
•2 tablespoons of butter, melted, plus extra for brushing over the top of the dough
•4-½ cups, plus about 3 tablespoons (reserved) of bread flour, or all-purpose
•1-½ teaspoons of seasoning salt
•1 tablespoon of canola oil
Instructions:
First, open your plastic bag and place it inside a bowl with the bag open and standing upward, add 1-½ cups of warm water, ¼ cup of Splenda, or regular sugar, and 2-¼ teaspoons of active-dry yeast. Close the bag and shake it for a minute. (I prefer to proof the yeast this way rather than adding my flour in the bag first. This is to make certain that my yeast is still active.)
Now, add 2 tablespoons of cooled melted butter, 4 cups of bread flour, or all-purpose, and 1-½ teaspoons of seasoning salt inside the liquid mixture. Close the bag and shake it vigorously this time. Squeeze the bag with your hands and fingers to incorporate all the ingredients together.
Burp the bag when it's needed (letting the excess air out of the bag).
Once the ingredients are all combined well, place the bag on your countertop. Allowing the dough to rest for thirty minutes.
Next, add about one tablespoon of flour to the bag of dough. Close the bag again and burp the dough by squeezing the bag. Squeeze the bag of dough ten to fifteen times with your fingers and hands (kinda like you're kneading it). Then open the bag and add one tablespoon of canola oil. Close the bag and shake it to distribute the oil around the dough's surface. (Don't knead the oil into the dough.)
Sit the bag back down on your countertop. Allow the dough to rest again for another thirty minutes.
Once the time has passed, add two tablespoons of flour into the bag. Shake and knead the bag.
Transfer the dough into a well-greased pan and allow it to rest again for at least an hour. Then brush an egg wash on top of your dough. Bake in a 375 degrees F oven for twenty-five to thirty-five minutes (times are depending on the type of pan you use).

Homemade country-style milk bread
If you haven't ever had homemade country milk bread, you're going to be in for a real treat. Milk bread is one of my favorite breads to make and to eat. It's light, fluffy, and easy to pull apart in rich airy layers. Plus, it's absolutely yummy! It's great to serve with breakfast, brunch, lunch, dinner, and even to eat at snack time.
With this recipe, there are a lot of steps to take. The dough will need to rest and rise a total of three times altogether. I will walk you through each step the best that I can and place the ingredients within each step as they are needed as we go through each step together. (Hopefully, it will be more helpful for you to follow.)
Step one:
To start creating your milk bread, you'll need these ingredients:
•4 cups of bread flour
•3 tablespoons of granulated white Splenda, or regular granulated white sugar
•1-½ teaspoons of salt (I prefer using seasoning salt to add extra flavor.)
•3 tablespoons of cold butter
Instructions:
Combine and mix the above list of ingredients in a large bowl. Mix the butter into the flour well, until it's incorporated. Mound the flour mixture up towards the center of your bowl, then use your fingers to make a small well in the center of the flour mixture.
Step two:
Ingredients:
•½ cup of water
•1 cup of regular whole milk
Instructions:
Combine the water and milk together; stir. Then warm the milk mixture until it reaches about 115 degrees F. (This can be done inside the microwave, or on the stovetop.)
Add a small amount of the milk mixture inside the well that you've made in the center of the flour mixture. Hold, don't pour all the milk in (for now) and just set it aside.
Step three:
Ingredients:
•2-¼ teaspoons of rapid rise (instant) yeast
Instructions:
Add the yeast in the center well, and slowly stir the yeast to mix it only in the well (the center) with the milk mixture. Once the yeast is incorporated with the warm milk mixture, allow it to bloom for one minute. (Wait for one minute before doing anything else.)
Now, using a fork, start mixing the flour slowly into the well. Slowly add the rest of the milk into the flour mixture. Always work in the center by pulling the flour in towards the well area. Once all the flour has been brought into the center of the bowl, begin working the dough by hand. Knead the dough for about four minutes. At this point, add more liquid if it still seems too dry. (This dough should feel wet and tacky in your hands. Not dry but not drenched either.)
Next, on a clean work surface, start kneading the dough furiously for eight to ten minutes.
Bring the dough into a ball shape and place it back into the bowl. Cover and let the dough rise for about two and a half hours.
Now, poke a hole in the center of the dough (with your finger). If the dough is ready, the hole will not close back up. Should the hole close up, allow the dough to rest longer. (Then do the poke test again. My dough had risen and stuck to my plastic wrap. At this point, you can really see the dough's appearance changing. The dough will be stuck to the sides of the bowl, it still will be somewhat sticky. This is how you know that the dough has proofed.)
It's now time to work the air out of the dough and to do this, you'll need to punch the dough down for a few minutes, then finish kneading the dough on your work surface. (Don't add flour to the surface, but if needed, you can sprinkle a small amount of flour on top of the dough.)
Cut the dough into three segments. Now, begin tucking and rolling the dough segments into three round-shaped balls. (I just place my three dough balls side-by-side in the same bowl that I started the dough out in.) Cover the dough once again and allow the dough to rise (again). Each ball of dough should double in size. (Usually this rest will take thirty minutes to possibly one hour.)
Step four:
This is the stage where the milk dough gets really interesting and fun to work with. It's also a very important step (just like each step has been up to this point).
Ingredients:
•Softened butter, enough to grease the bread pans with
Instructions:
Grease an 11x6 bread pan with butter.
Next, it's time to deflate the dough balls. Using your hands, press the dough out flat, then roll the dough out flat (almost like how you make pizza dough). Don't flour your work surface. You can dust the top of the dough and your rolling pin with a little flour if it's absolutely needed. Use a scraper to lift the dough off the surface. (I did not use any flour to roll or shape my dough. So, it's doable. At this point, the dough is springy and does look similar to pizza dough.)
Now, take the length side of the dough and fold it towards (just to) the center point of the dough. Do the same on the other side. Then begin rolling the dough (at the short (width) side). Roll into a small log shape and pinch the end of the dough together where it ends. Do the other two dough balls in the same manner. Then place each into the buttered bread pan side by side with the seam sides down.
Cover the bread pan and allow the dough to rise again. It should double in size again. (This dough rest generally takes close to an hour.)
About twenty minutes before your bread is done proofing, turn your oven on to 350 degrees F.
Step five:
There's two methods that work well for this part: an egg wash, or a milk wash.
Ingredients:
•1 egg, whisked with 1 teaspoon of water, or use warm milk instead (both of these methods will help the bread brown during baking, your bread will come out shinier using the egg)
Instructions:
Time to make an egg wash! Place the egg and one teaspoon of water in a bowl and whisk it, then, using a pastry brush, brush the top of your dough with the egg wash. You can add a tablespoon of water, or milk when making the egg wash. Doing so will make the end results of your bread crust shiny, crispy, and a darker brown.
Note:
Today, I decided to use the warm milk method, instead of brushing my dough with an egg wash.
To use the warm milk method, place two tablespoons of milk in a microwave-safe dish; heat the milk for a few seconds until it's warm. Then, using a pastry brush, brush the milk over the dough. Proceed with the following instructions.
Use whichever browning method that you prefer, but make sure that you do at least one, otherwise your milk bread will not brown as well as it's supposed to.
Now, place the bread pan in a 350 degree F oven. Bake for about thirty minutes to forty minutes (depending on how brown you want your bread). During the last five minutes of cooking, I brush melted butter over the top of the bread. This isn't necessary, but it makes the crust crunchier and buttery.
Thump the top of the loaf. It will sound hollow when it's baked through.
As soon as your bread is baked, take it out of the bread pan and allow it to cool.

Bacon Bisquick Biscuits
Today, I prepared bacon biscuits with Bisquick, but you can also make them using self-rising flour. These biscuits are so yummy! They're layered almost like buttermilk biscuits, but I don't use buttermilk in this recipe, even though you definitely could.
Ingredients:
•3 cups of Bisquick baking mix
•1-1/2 cups of bacon, cooked and cut into small pieces.
•1/2 cup of cold butter
•about 1 cup of milk
•Flour for rolling the dough out
Instructions:
Preheat the oven to 450 degrees F. Grease a pan with cooking spray and set it aside.
In a medium-sized bowl, combine the Bisquick mix and the cold butter with a fork.
Now, add the milk slowly and combine. The dough should not be too wet. You'll want it to come together so that it can be handled easily without sticking to your fingers. Sometimes I need the entire cup, and other times I don't. It has something to do with the weather.
Next, sprinkle flour onto your workspace and turn your dough out on it. Roll the dough out thin. Sprinkle extra flour over the top of the dough if needed.
Sprinkle a half cup of your prepared bacon over the top of the rolled-out dough. Then fold the dough on both ends to meet in the middle. Roll the dough out flat again. Do these steps three times. With the dough rolled out flat, once again, sprinkle the remaining bacon pieces over the top. Follow the same steps as before.
Now, cut the dough out with a biscuit cutter or slice the dough into squares. Place the cut-out biscuit dough on the prepared pan.
Bake the biscuits for about eight to ten minutes, or until the bottoms and tops of the biscuits are browned to your preference.
Serve your bacon Bisquick biscuits with peppered milk gravy. Enjoy!
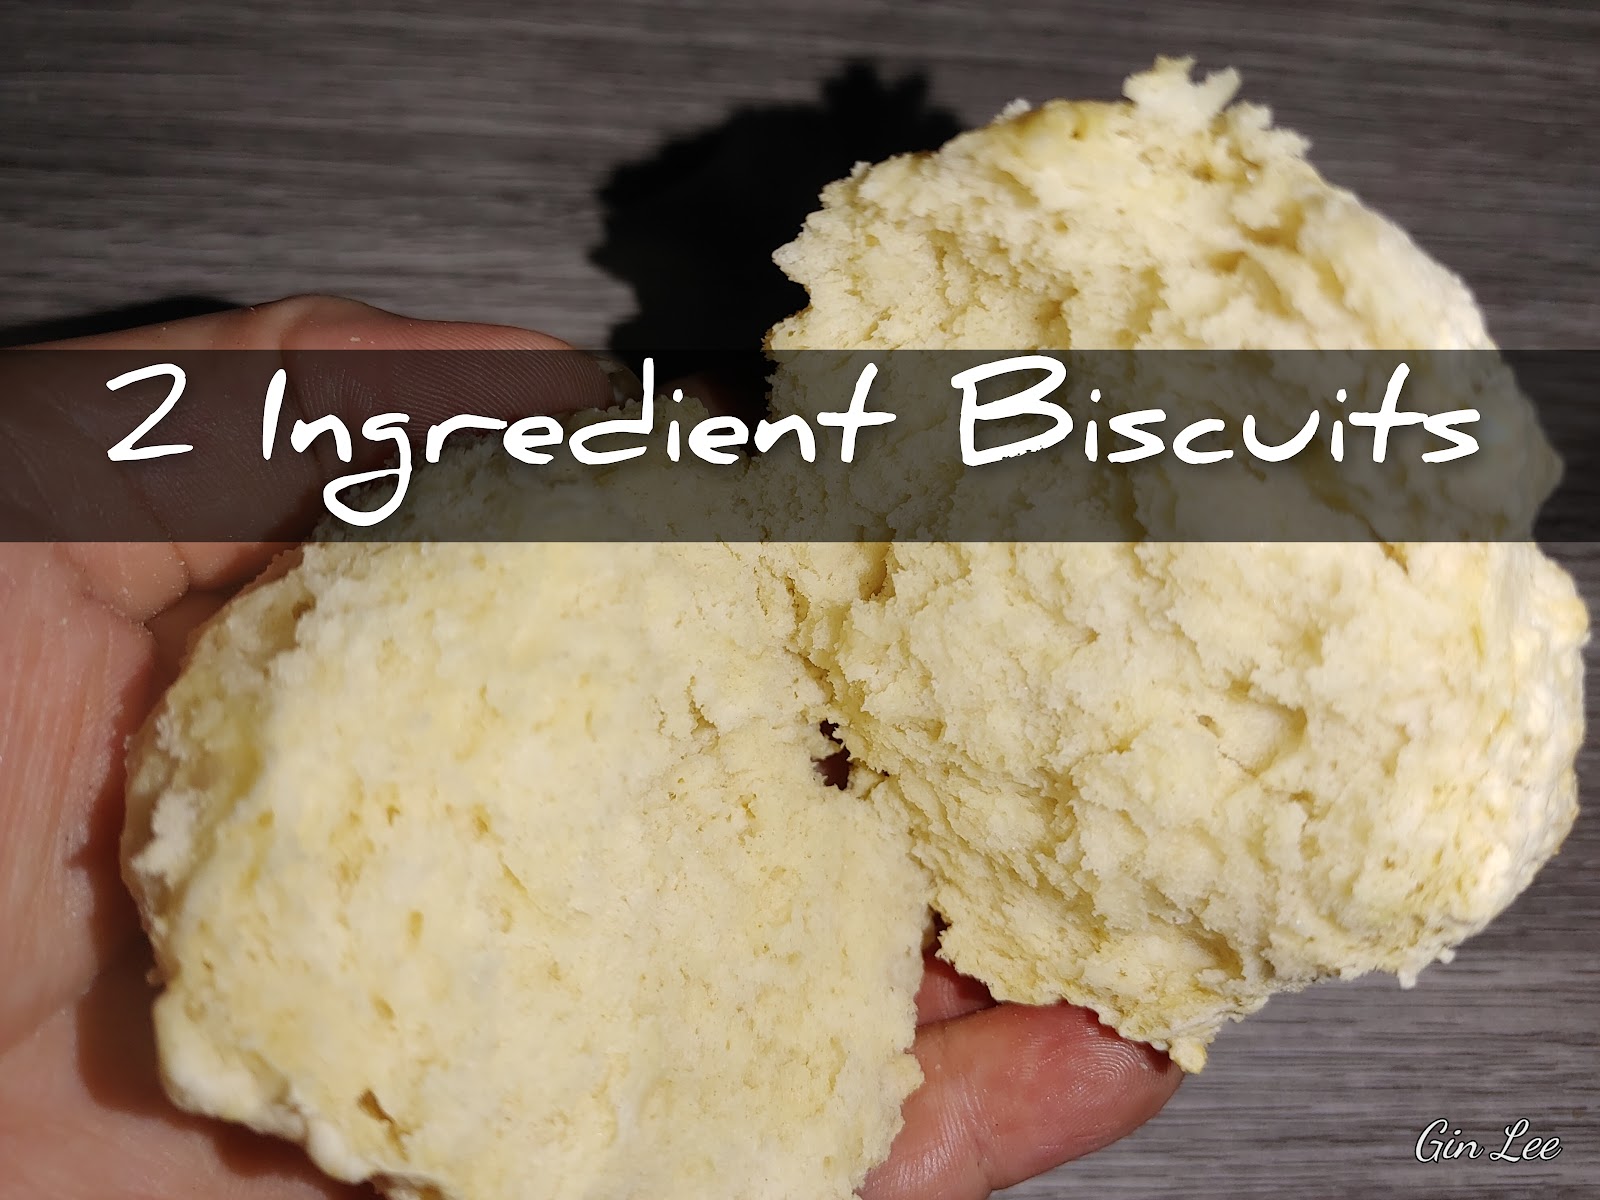
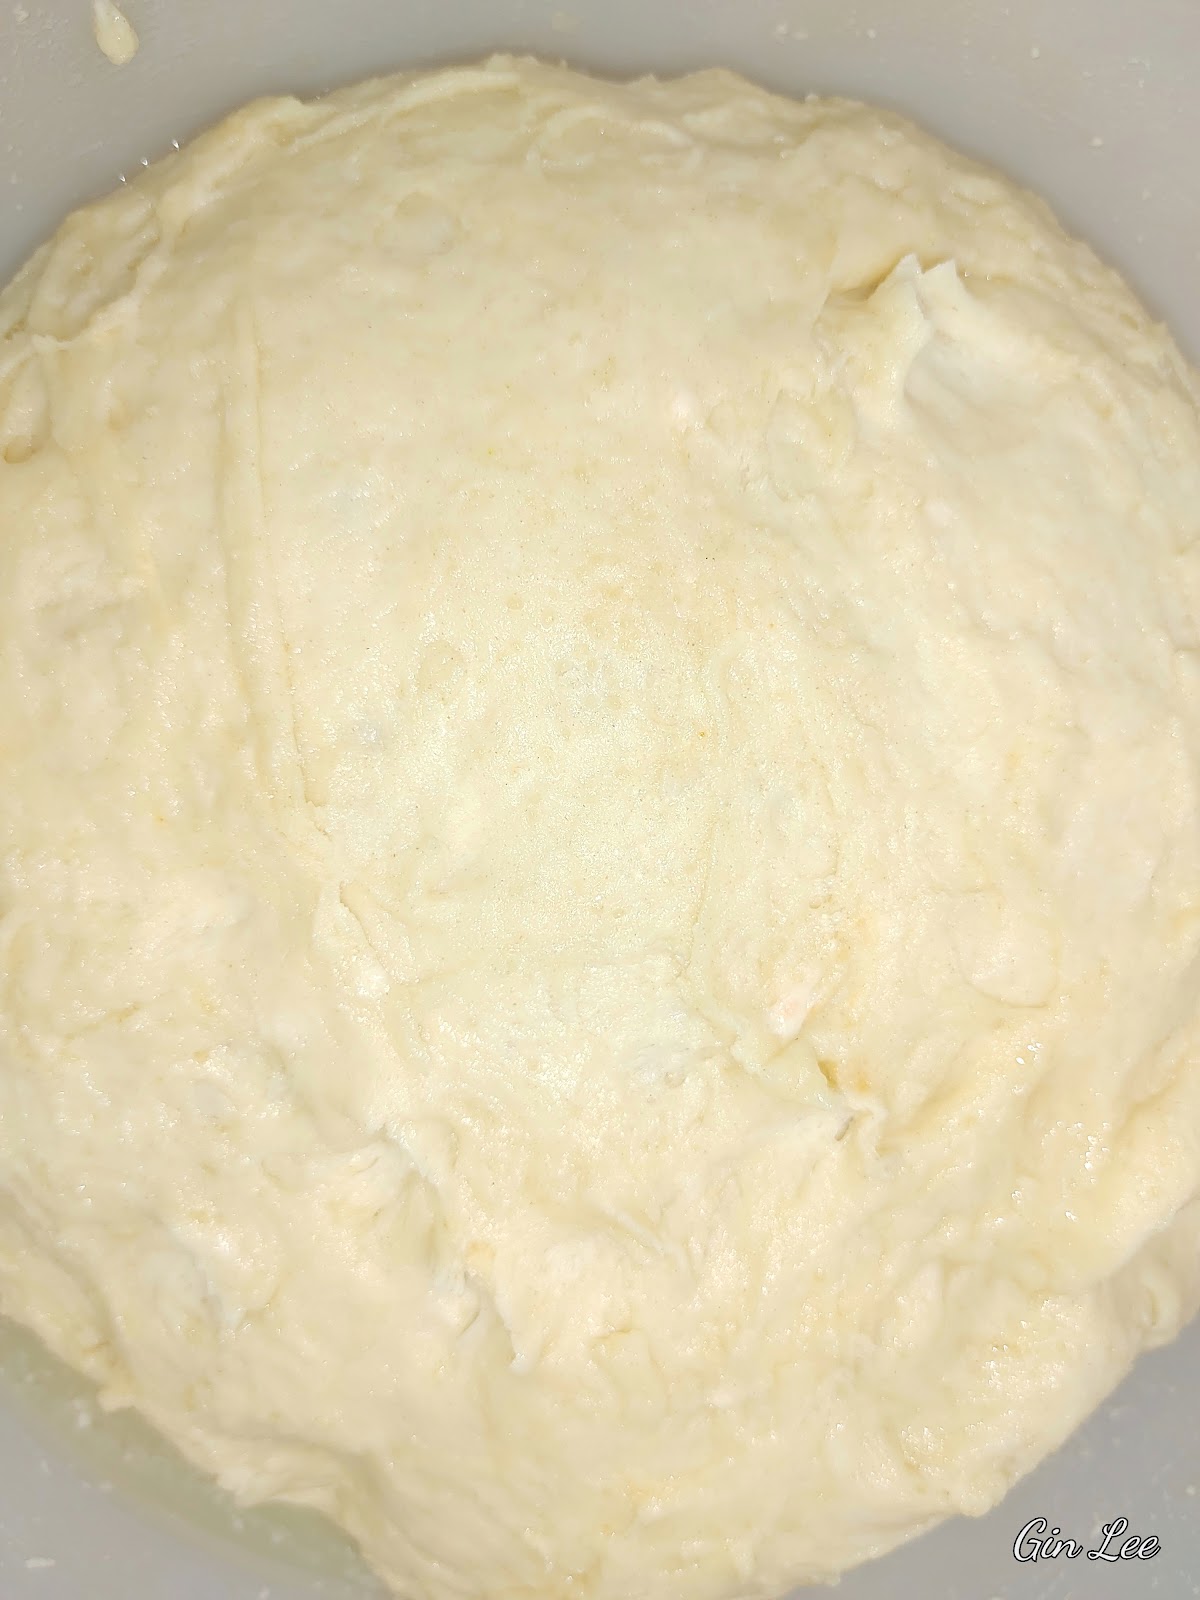
Basic 2 ingredient biscuits
All I use to make my two ingredient biscuits is self-rising flour and warm water. That's it! The biscuits turn out perfectly for dunking in a bowl of milk gravy, making breakfast sandwiches, and serving alongside any other meal.
When I make my two ingredient biscuits, I never roll the dough out. Doing so tends to make the biscuits tough. I don't use butter, margarine, or any other type of fat in this biscuit recipe. So, the dough should never be overworked.
This recipe will make five nice sized biscuits. The biscuits will rise and have a nice bread texture.
Ingredients:
•1-⅓ cups of self-rising flour
•1 cup of warm water
Instructions:
First, for these biscuits you'll want to sift your flour.
In a bowl, add the prepared flour. Then pour in the warm water over the flour. Combine well with a fork. Knead the dough until it forms into a ball, but do not over knead the dough.
Allow the biscuit dough to sit for thirty minutes. (This softens the dough and is a crucial step since the biscuits don't have any type of fat in them.)
Now, pinch the dough out for the size biscuits that you prefer. Shape them by hand, then place them on a pan and bake for ten to twelve minutes in a 425 degrees F oven.
Serve and enjoy!
Note:
Place the biscuits side-by-side where they are touching each other inside the pan. Doing this will also help them rise.

Homemade buttermilk sunshine biscuits
If you enjoy bread, today I am preparing my homemade buttermilk sunshine biscuits. These biscuits have nice, buttery flavored layers and a browned crunchy crust. To enhance the crust, I brush the tops of the dough with extra buttermilk before baking, then while the biscuits are baking, I brush the tops with melted butter to brown them. Plus, during the last few minutes of baking, I flip the biscuits over to brush the bottoms with extra melted butter. This is what creates the golden sunshine color on the outside of their crusts.
Ingredients:
•2-½ cups of self-rising flour, extra flour to roll the biscuits dough out
•8-10 tablespoons of butter, softened
•1 cup of buttermilk, plus three tablespoons to brush over the tops of your biscuit dough
•2 tablespoons of melted butter, to brush over the tops of your biscuits when browning them
Instructions:
In a bowl, add the self-rising flour and softened butter together. You can use a food processor or cut the butter into the flour with a fork or a pastry cutter.
Now, slowly add the buttermilk to the buttery flour mixture. Combine all the ingredients well.
Next, transfer your biscuit dough to a floured surface. Pat your dough out with your hands, or roll it with a rolling pin as thin or as thick as you prefer. (I like making my biscuits thick and big, so I don't roll my dough out very thin.) Once you have done this, fold your dough in half and pat it down, or roll it out once again. Do this four to six times. This step is required if you want your biscuits to be flaky and have layers. (You may also add more softened butter to your dough during this step. To do that, add extra softened butter evenly (on top of your dough) during the folding process. This works better if your butter is soft enough to smear it over the dough. Fold the butter sides together, then pat your dough down, or roll it out with a rolling pin.) Each time you fold your dough, fold it in a different direction so that you'll have multiple layers.
Next, use a scallop/flower shaped biscuit cutter as I did, or any other type of biscuit cutter to cut your dough.
Transfer your cutout dough to a lightly buttered baking tray or a cast-iron skillet, with the sides touching. (Since I used a scalloped flower biscuit cutter, I allowed the edges of the petals to touch.) Doing this will help your biscuits to rise more and be flakier. Now, brush your cutout biscuit dough with the extra buttermilk (optional).
Transfer your pan to a 375 degrees F oven and bake for about fifteen minutes. During the baking process, brush the tops of your biscuits with melted butter. Flip your biscuits over to brush the bottoms of each with melted butter. Doing this will give your biscuits a crunchy buttery browned crust, but it's also optional.
Serve with peppered sausage gravy. Enjoy!

Bisquick biscuits rolled by hand
These biscuits are not drop biscuits nor is the dough rolled out on the countertop. Instead, they're rolled by buttered hands and with lots of love. Awe!
Ingredients:
•2 cups of Bisquick
•½ cup of milk
•4-6 tablespoons of softened butter
Instructions:
Preheat the oven to 450 F degrees. Grease a cooking tray, and set it aside.
In a medium-sized bowl, combine the Bisquick mix and four tablespoons of softened butter with a fork.
Now, add the milk and combine, but don't overwork the Bisquick dough. If you do, it will make the outcome of the biscuits texture tough.
Now grease your hands with butter. Take a heaping spoonful of the dough and roll it around in the palm of your hands. Place the rolled biscuit on the prepared tray. Repeat until all the dough is used. (Sorry, I didn't take anymore photos while making the biscuits because my hands were covered in butter.)
Bake the biscuits for about eight minutes or until the bottoms and tops of the biscuits are golden brown.
Slice each biscuit in half and add a slice of butter in the middle of each one. Serve with gravy or whatever else you prefer.
Notes:
I normally make four jumbo-sized biscuits from this recipe.
If you don't have milk on hand, this biscuit recipe will also make yummy biscuits by using water instead. I make them both ways. I have also used powdered milk as a substitute and the biscuits turn out delicious every time.

Old-fashioned tin-can bread
So, you'd like to make a loaf of homemade bread, but you don't have a bread pan. That's not a problem! Today, allow me to show you how I make basic mini loaves of bread quickly and simply by using clean, empty tin cans. Yes, it can be done easily. No pun intended. Just make sure that you grease the inside of your tin cans well with cooking spray.
Ingredients:
•3 cups of self-rising flour
•2-1/4 cups of milk
•cooking spray for greasing your tin cans
Instructions:
For this recipe, you can use 15-ounce cans or 28-ounce cans. Only fill the cans about halfway with the dough. Today I am using two 15-ounce cans and one 28-ounce can. (The larger cans will need a little more baking time.)
In a bowl, add the self-rising flour. Slowly pour in the milk. Mix the ingredients with a wooden spoon or spatula until they're combined. This is supposed to be a wet, unkneaded dough, but it should not be overly wet. Add extra flour if needed.
Grease your tin cans with cooking spray. Then transfer the dough to the prepared tin can or cans. Only fill the cans about halfway with the dough. Place the filled cans on a cookie tray to prevent any spillovers inside your oven during baking.
Transfer your tin cans to a 350-degree oven and bake for about 30 to 40 minutes, or until your bread is browned to your preference. Once your bread has risen and baked for at least 15 or 20 minutes, lay the cans on their sides and finish baking. You'll want to do this to ensure that the bread is cooked throughout the center.
Once your tin can bread is finished baking, turn the cans upside down to flip the loaves of bread out onto a cutting board or cooling rack. Allowing it to cool completely before slicing.

Homemade pull apart dinner rolls
To me, there's almost nothing more tempting than a platter full of fresh homemade dinner rolls. I just absolutely love fresh bread! The fragrant scent of these rolls baking is always so gratifying, and when they're done baking, the taste is absolutely satisfying!
Ingredients:
•3 cups of self-rising flour
•1 package of rapid rise yeast
•¼ cup of granulated Splenda, or your preferred sweetener
•½ teaspoon of kosher salt
•¼ cup of canola oil
•½ cup of warm water
Instructions:
In a large bowl, add the flour. Make a nest hole in the center of the flour. Now, add the yeast, kosher salt, sweetener, oil, and the warm water. Work the ingredients slowly together into a loose ball shape. Add extra flour if needed.
Once the dough has come together, place the bowl in the microwave and heat for thirty seconds. Next, cover the top of the bowl with plastic wrap tightly. Now, allow the dough to sit covered in a warm area for at least one hour.
Now, grease a 9x13 glass dish. Begin rolling the dough into roll-sized balls. Place each dough ball into the dish. Continue until all the dough is used. I place the dough balls side by side closely. They will spread together, but they'll pull apart easily when they are baked.
Immediately, cover the dish with plastic wrap. Allow the dough to rise for the second and last time for about thirty minutes.
Place the dish into a 350 degree F oven and bake for about fifteen minutes, or until the tops are slightly golden.
Note:
I use self-rising flour when I prepare this recipe, because it really makes a world of difference in the way these rolls turn out.
The reason why I put the dough into the microwave (to heat up for thirty seconds) before allowing the dough to rise its first time is because once the dough is covered with the plastic wrap, the heat will be trapped inside. The extra heat and humidity help the dough to rise faster. You don't have to do these steps, but if you do, your rolls will turn out much better.

Country-style English muffins
English muffins are the perfect go to breakfast bread because they can be toasted, buttered, or be used to make the most amazing breakfast sandwiches. The muffin dough will need time to rest, so if you're wanting English muffins for breakfast, it's best to create the dough ahead of time.
Ingredients:
•1-¼ cup of water of warm water
•2 tablespoons of Splenda, or sugar
•1 package of yeast
•3 cups of self-rising flour
•1 teaspoon of seasoning salt (used to add extra flavor)
•2 tablespoons of canola oil (plus extra to oil the bowl)
•White cornmeal (enough to sprinkle over the muffin dough)
Instructions:
In a bowl, add the water, milk, and Splenda together; stir. Add the yeast; stir and set aside.
Now, in the same bowl, add the flour and the canola and mix until all the ingredients are well combined. Continue to mix the dough for about ten minutes.
Next, using a paper towel, or your fingers grease another bowl (or just use the same bowl as I have done) with canola oil, then add your dough to the bowl. Place plastic wrap over the bowl and allow the dough to rest until it's doubled (or up to one hour) in a warm room.
Once the dough is ready, turn it out onto a floured surface. Just kinda pat your dough down without rolling it out and without kneading it. Lightly brush the top of the dough with a little oil.
Next, using a wide-mouthed or regular-mouthed jar, or a circled biscuit cutter, cut the dough out into circle shapes (I use a large-mouth (jar) ring. The dough makes eight English muffins this size). This is going to be a pretty sticky dough. Add flour to your hands and utensils if needed.
Note:
You can shape the dough into eight to ten segments and shape them into circles. If you do, make sure you pat the rounds of muffin dough down to about ½ inch in thickness.
Now, lightly sprinkle the white cornmeal over a baking tray. Transfer your cut out circles of dough to the pan. Sprinkle the tops with a little more cornmeal.
Cover the pan and allow the cut circles of dough to rise for another twenty minutes.
Next, there are three ways that you can cook your muffins.
Heat a skillet, add about a tablespoon of oil, or butter. Allow the skillet to get warm, on medium-low heat. Begin placing one to four pieces of the cutout circles into the warm skillet. Allow the muffins to cook for about four to six minutes per each side; repeat the steps with the remaining muffin dough.
If you prefer, you can place the muffin dough on a greased baking tray and bake them in a 400 degrees F. oven for ten to twelve minutes, or until both sides of the muffins are browned. (If needed, flip the muffins over to finish browning.) This isn't the traditional skillet method, but they'll rise higher in the oven and be delicious when done.
Slightly oil the griddle, allow the griddle to get hot and transfer the pieces of prepared muffin dough onto it. Sprinkle the tops lightly with white cornmeal. Cook for four to six minutes, then flip them over with a spatula and do the same.
Next, allow your fresh country-style English muffins to sit for about twenty minutes before slicing them in the centers. After that, smear them with butter and jam, or fill them with your favorite fixings. Serve and enjoy!

Savory Biscuits
This recipe makes some of the best biscuits to serve with savory meats, casseroles, soups, and stews. They're even great to serve alongside breakfast chops in the morning.
Ingredients:
•2 cups of self-rising flour
•1/2 cup of vegetable shortening
•1/2 teaspoon of freshly ground black pepper
•Just a pinch of seasoning salt
•Just a small pinch of each of the following spices: oregano, thyme, cayenne pepper flakes, garlic powder, and dried tomato flakes
•3/4 cup of whole milk
Instructions:
Sift two cups of self-rising flour three times. Then add it to a medium-sized bowl.
Now, add 1/2 cup of vegetable shortening to the seasoned flour. Using a fork to cut the vegetable shortening into the flour (do this until all the shortening is well combined with the flour.) At this point, the flour mixture will have little pea-sized lumps.
Add 1/2 teaspoon of freshly ground pepper, a pinch of seasoning salt, and a small pinch of oregano, thyme, cayenne pepper flakes, garlic powder, and dried tomato flakes. Combine well.
Add 3/4 cup of whole milk to the flour mixture and combine well. Do not overwork the biscuit dough.
Next, grease a pan with butter, shortening, or oil. Pinch the dough to form whatever size biscuits you prefer and roll it in the palms of your clean hands. You can butter your hands if needed. Make all the dough into rounds, then place them on your prepared pan. Pat each round down flat (just a little).
Transfer your pan to a 375-degree F oven and bake anywhere from 15 to 20 minutes, or until they are browned to your preference. I brush the tops of my biscuits with melted butter during the last five minutes of baking, but this is optional.
Serve your biscuits with savory pork chops, chicken, ham, or whatever else you desire. Enjoy them!

Homemade flour tortillas
Save money and enjoy making homemade soft-shell flour tortillas at home, using only three ingredients. With my recipe, you can make various sized flour tortillas to make street tacos, regular tacos, taco bowls, Mexican pizza, burritos, chimichangas, enchiladas, etc.. The recipe is so simple to make. I hope you'll try it!
Ingredients:
•2 cups of self-rising flour
•3 tablespoons of shortening
•3/4 cup of water
Instructions:
Add the self-rising flour and shortening together and mix with a fork until the mixture comes together in pea-sized shapes.
In the center of the flour mixture, make a circled well. Add the water. Slowly mix the dry and wet ingredients together with your fingers until it comes together as a dough.
Place the dough on a lightly floured countertop. You'll need to knead the dough for about five minutes, or until it becomes smooth.
Any extra puffed skillet bread can be wrapped in wax paper, then plastic wrap and stored inside your freezer.
Once your dough is finished, cover it with a tea towel and allow it to rest for thirty-five minutes.
Press the tortilla dough into flat circles:
First, pinch off a small amount of dough (to the size that you prefer) and form into a ball shape.
To make tortillas about six inches on a tortilla press. Roll each piece of dough into a ball-shaped-size.
Now, transfer the ball of dough down to the center of your tortilla press and press down the handle. You should use plastic wrap, waxed paper, plastic bags in between the dough and dough press. This will keep the dough from sticking. (Do this even if you're rolling the dough out on the countertop.) This step will flatten the dough out into a circle shape. Do this about six to eight times with each piece, and each time rotate the dough.
Follow these steps until you get the dough pressed out as thin as it needs to be. Then open your tortilla press and transfer the pressed dough to a very hot skillet (no oil needed).
Personally, I steadily work on pressing my dough out while I am cooking each tortilla. By the time I get one pressed, the one I have in the skillet cooking is done. This method works well for me, but you can press all the circles first and then cook them. (If you press all the dough first, make sure to place wax paper in between the dough circles, to prevent them from sticking together.)
Cook the flour tortillas in a hot skillet over a medium-high temperature for about two minutes on both sides. The tortillas will puff up in places and be browned when they're done.
Once cooked, place the hot tortillas in a dish covered with a tea towel to keep them warm while you repeat the above steps.

Homemade skillet puff bread
This bread recipe is not fried bread, although it is cooked in a hot skillet. It is very similar to pita bread, or perhaps Naan bread. However, it doesn't require yeast or baking soda. I make the skillet puff bread using self-rising flour instead of using all-purpose flour. The self-rising flour allows the bread to puff up once you begin cooking it in the skillet. So, there's no need to wait hours for the yeast reaction. I do allow the dough to rest for about ten minutes, but that's optional. It only takes about five minutes to cook each piece of puffed skillet bread and about ten to fifteen minutes to prepare the dough. The puffed bread turns out perfectly soft and delicious.
I like making puffed skillet bread to have on hand for breakfast wraps and other types of sandwich wraps. They can be made in advance and stored in the freezer, or eaten hot as soon as they're cooked.
This recipe will make six large pieces of puffed skillet bread, or about twelve mini pieces, depending on how big you want each piece to be.
I use one egg in my recipe to add extra flavor, but adding it is optional. The bread will turn out either way.
Ingredients:
•2 cups self-rising flour
•A pinch of seasoning salt
•A pinch of your preferred sweetener (I use Splenda)
•⅓ cup of milk
•1 egg (optional)
•⅓ cup of water
•2 teaspoons of your preferred oil, (I use canola)
Instructions:
In a bowl, add the flour along with a sprinkle of seasoning salt and the sweetener. Then add the milk and egg; combine well. Slowly add in the water while mixing the dough into a ball. At this point, you'll want the dough to be sticky but not too wet.
Allow the dough about five to ten minutes to rest before proceeding to the next step (optional).
Sprinkle a little flour onto your counter and transfer the dough to it. Divide the dough out into six separate pieces, or ten to twelve pieces, to make mini sized pieces of puffed bread.
Now, work with one piece of dough at a time. Shape each piece into a thin round disc with a rolling pin. If you'd like to have each piece perfectly round, lay a bowl out over the rolled dough and cut around it with a knife.
Place a large cast-iron skillet over medium heat, allow the skillet to get really hot.
Before placing the dough into the skillet to cook, brush each piece with cooking oil on both sides. Now, place one of the pieces flat in the skillet. Cook the bread on the first side, then flip it over with a spatula to cook the other side. The bread will begin to puff up about as soon as it hits the hot skillet, and it doesn't take very long to cook each piece of puffed bread. (I cook mine for about five minutes total.)
Serve the bread with your favorite toppings, or use them to make sandwich wraps.
Cook the flour tortillas in a hot skillet over a medium-high temperature for about two minutes on both sides. The tortillas will puff up in places and be browned when they're done.
Once cooked, place the hot tortillas in a dish covered with a tea towel to keep them warm while you repeat the above steps.

Homemade banana nut bread
Nothing says lovin' like a delicious, mouth watering loaf of fresh bread. Especially when it is banana nut bread!
When I make my banana nut bread, I usually double the recipes, sometimes even tripling it. The majority of the time I add extra pecans on the bottoms of my prepared pans, and then add more pecans on top of the bread batter before I bake it. Other times I will omit the nuts altogether. When using nuts, my preferred choice is usually pecans, since I have a grove of pecan trees. However, you can definitely use any type of nuts for my banana nut bread recipe, or omit them altogether.
This recipe will make one large pan of banana nut bread, or two mini size loafs. Depending on the size of bread pans you're going to use.
Ingredients:
•4 ripe bananas, peeled and mashed
•⅓ cup butter, melted
•½ cup of chopped pecans, and about a ½ cup whole pecan pieces for the top of the bread
•½ cup of white granulated Splenda, or sugar
•1 large egg, beaten (egg replacement can be used)
•1 teaspoon vanilla extract
•½ teaspoon of rum or brandy extract
•1-½ cups of self-rising flour
•½ tablespoon of ground cinnamon and about 2 tablespoons of sugar or Splenda mixed together, for final add on before baking.
Instructions:
Preheat the oven to 350°F and butter a 4x8-inch bread pan. Make sure that the inside of the bread pan is completely coated well. Next, I normally sprinkle a good dusting of Splenda, mixed with cinnamon on all sides of my buttered pans. This step is completely optional.
In a fairly large mixing bowl, mash the ripe bananas with a fork or a potato masher, until bananas are smooth. Make sure there are no lumps of banana. Stir the melted butter into the mashed bananas.
Next, stir in the Splenda, or sugar, beaten egg, or egg replacement, and vanilla, rum and or brandy extract. Mix in the flour. Combine and stir extremely well.
Once that's done, pour the batter into your prepared bread pan. Now add whole pecan pieces on top of the batter.
Next, sprinkle a dusting of Splenda, or sugar and cinnamon over the dough.
Bake for about 1 hour at 350 degrees F or until a toothpick inserted into the bread comes out clean. (Make sure after 40 minutes to really start watching over your bread, sometimes depending on the weather, and depending on different ovens, the bread will be done before the hour is up.)
Remove the banana nut bread from the oven and allow it to cool. (I usually let mine cool in the pan for about an hour on a cooling rack.) Once the bread has cooled completely, use a knife to go around all the edges of the bread pan (to help loosen the bread). Then remove the banana bread from the pan, gently by placing a platter over the top of the bread pan, and turn it upside down. The bread should slide out of the pan very easily. Slice and serve.
Want to make Chocolate Chip Banana Bread?
Simply add 1 package of dry instant chocolate pudding mix in the batter, stir. (Or add in 2 tablespoons of cocoa powder.) Next, add in a handful of chocolate chips, stir. Follow the rest of my recipe above.
Want to make Peanut Butter Banana Bread?
Simply add ½ to 1 cup of peanut butter, depending on how much of a peanut butter taste that you want. Then follow the rest of my recipe above.
Note:
You can absolutely bake this dough in muffin tins as well. Make sure your muffin pans are lightly sprayed with cooking oil (or line with paper muffin cup liners).

Peach griddle cakes
Whether it's for breakfast, brunch, or just a snack, peach griddle cakes are such a delicious treat.
Ingredients:
•2 cups of diced peaches (about 3 fresh medium peaches or a can of canned, drained peaches)
•2 cups of self-rising flour
•2 tablespoons of Splenda or sugar
•1-1/3 cups of milk
•2 eggs or egg substitute
•2 tablespoons of melted butter for the batter
•Cooking spray
•Toppings of your choice can be pancake syrup, whipped cream, butter, fresh fruit, jelly, or jam.
Instructions:
If using fresh peaches, peel and pit them first, then dice or slice them thinly and set aside. If using canned peaches, you'll need to drain the juice off of them before using.
In a bowl, combine 2 cups of self-rising flour and 2 tablespoons of Splenda or sugar together; stir.
In a separate bowl, combine 1-1/3 cups of milk, 2 eggs, or egg substitute, and whisk until the mixture becomes frothy and light.
Now, pour the egg and milk mixture in with the dry ingredients. Add 2 tablespoons of melted butter. Whisk until the batter comes together, but do not overmix. (Overmixing will make tough griddle cakes.)
Now, add two cups of prepared peaches to the batter. Stir just until combined.
Next, turn the griddle on and allow it to get extra hot. Once it's come to temperature, spray your griddle with cooking spray. Then, using a large dipping spoon, spoon out enough of the peach batter to make the size griddle cakes that you prefer.
Cook for one to two minutes per side at a medium-high temperature.
Stack your cooked griddle cakes and add the toppings that you desire. Serve and enjoy!

Apple and cinnamon griddle cakes
Today, I will be preparing a recipe that's quite simple to prepare, extremely delicious, and about as American as a homemade apple pie. Need I say more? These apple griddle cakes can be served for breakfast, but I like preparing them as an evening dessert because, in my opinion, they taste very similar to a homemade apple cobbler. Especially when they're topped with frozen vanilla yogurt, whipped cream, or vanilla ice cream.
Ingredients:
•2 cups of canned, diced apples, or use 2 large apples peeled, cored, and diced, or use apple pie filling with no sugar added.
•1 egg
•3 tablespoons of Splenda or regular sugar
•1 tablespoon of Splenda brown sugar blend or regular brown sugar
•2 teaspoons of ground cinnamon
•1 teaspoon of pure vanilla extract
•1-1/2 cups of Bisquick mix
•1/2 cup of milk
•Cooking spray to spritz on the griddle
Instructions:
In a medium-sized bowl, add 1 egg and 3 tablespoons of Splenda or regular sugar, 1 tablespoon of Splenda brown sugar blend or regular brown sugar, and 2 teaspoons of ground cinnamon together until the egg mixture becomes frothy and creamy. Then add 1 teaspoon of pure vanilla extract, 1-1/2 cups of Bisquick mix, and 1/2 cup of milk, and combine well. Then fold in the canned apples.
Now, preheat the griddle on medium heat. Once your griddle comes to temperature, spritz a small amount of cooking spray over it.
Using a large spoon, transfer the apple batter to your hot griddle. Cook each griddle cake for about 2 to 4 minutes (depending on how brown you prefer yours). Flip the griddle cakes once the bottom sides are done.
Serve your apple griddle cakes with syrup, plain Greek yogurt, frozen vanilla yogurt, whipped cream, or vanilla ice cream as a sweet and yummy treat, and enjoy!
Note:
If you don't own a griddle, you can use a skillet to make apple pancakes.

Cinnamon breakfast muffins
This morning I am preparing muffins, which are the next best thing to cinnamon buns, in my opinion. I hope that y'all will try these and enjoy them! They're not only filling, but they're extremely yummy.
Ingredients:
•1/3 cup of butter, melted
•1/2 cup of Splenda or regular granulated sugar
•1 egg or 1/4 cup of applesauce
•1-1/2 cups of self-rising flour
•1/4 teaspoon of nutmeg
•1/4 teaspoon of ground cinnamon
•1/2 cup of milk (any type of milk works fine)
Topping ingredients:
•2-4 tablespoons of melted butter to be brushed on top of each muffin before sprinkle the cinnamon mix over them.
•1/2 cup of Splenda, sugar, or light brown sugar
•1-1/2 teaspoons of ground cinnamon
Instructions for the muffins:
Spray a muffin pan with cooking spray and set it aside.
In a medium bowl, add 1/2 cup of Splenda or regular granulated sugar, 1-1/2 cups of self-rising flour, 1/4 teaspoon of nutmeg, and 1/4 teaspoon of cinnamon. Whisk the ingredients together.
Now, add 1 egg or 1/4 cup of applesauce, 1/3 cup of melted butter, and 1/2 cup of milk to the dry ingredients. Using a spoon or spatula, stir the ingredients just until they're all incorporated. (Be careful not to overmix the batter.)
Scoop the muffin batter into the prepared muffin pan with a big spoon. The batter will make eight to twelve muffins, depending on how full you fill your tins.
Transfer your muffin pan to a 350-degree oven. Bake for about 25 minutes, or until the tops of the muffins turn a golden brown.
Instructions for the topping:
Melt the butter and brush it over each baked muffin.
Mix 1/2 cup of Splenda (or sugar) and 1-1/2 teaspoons of cinnamon together in a bowl.

While the muffins are hot, dunk the buttered tops into the cinnamon mixture over the top of each one.
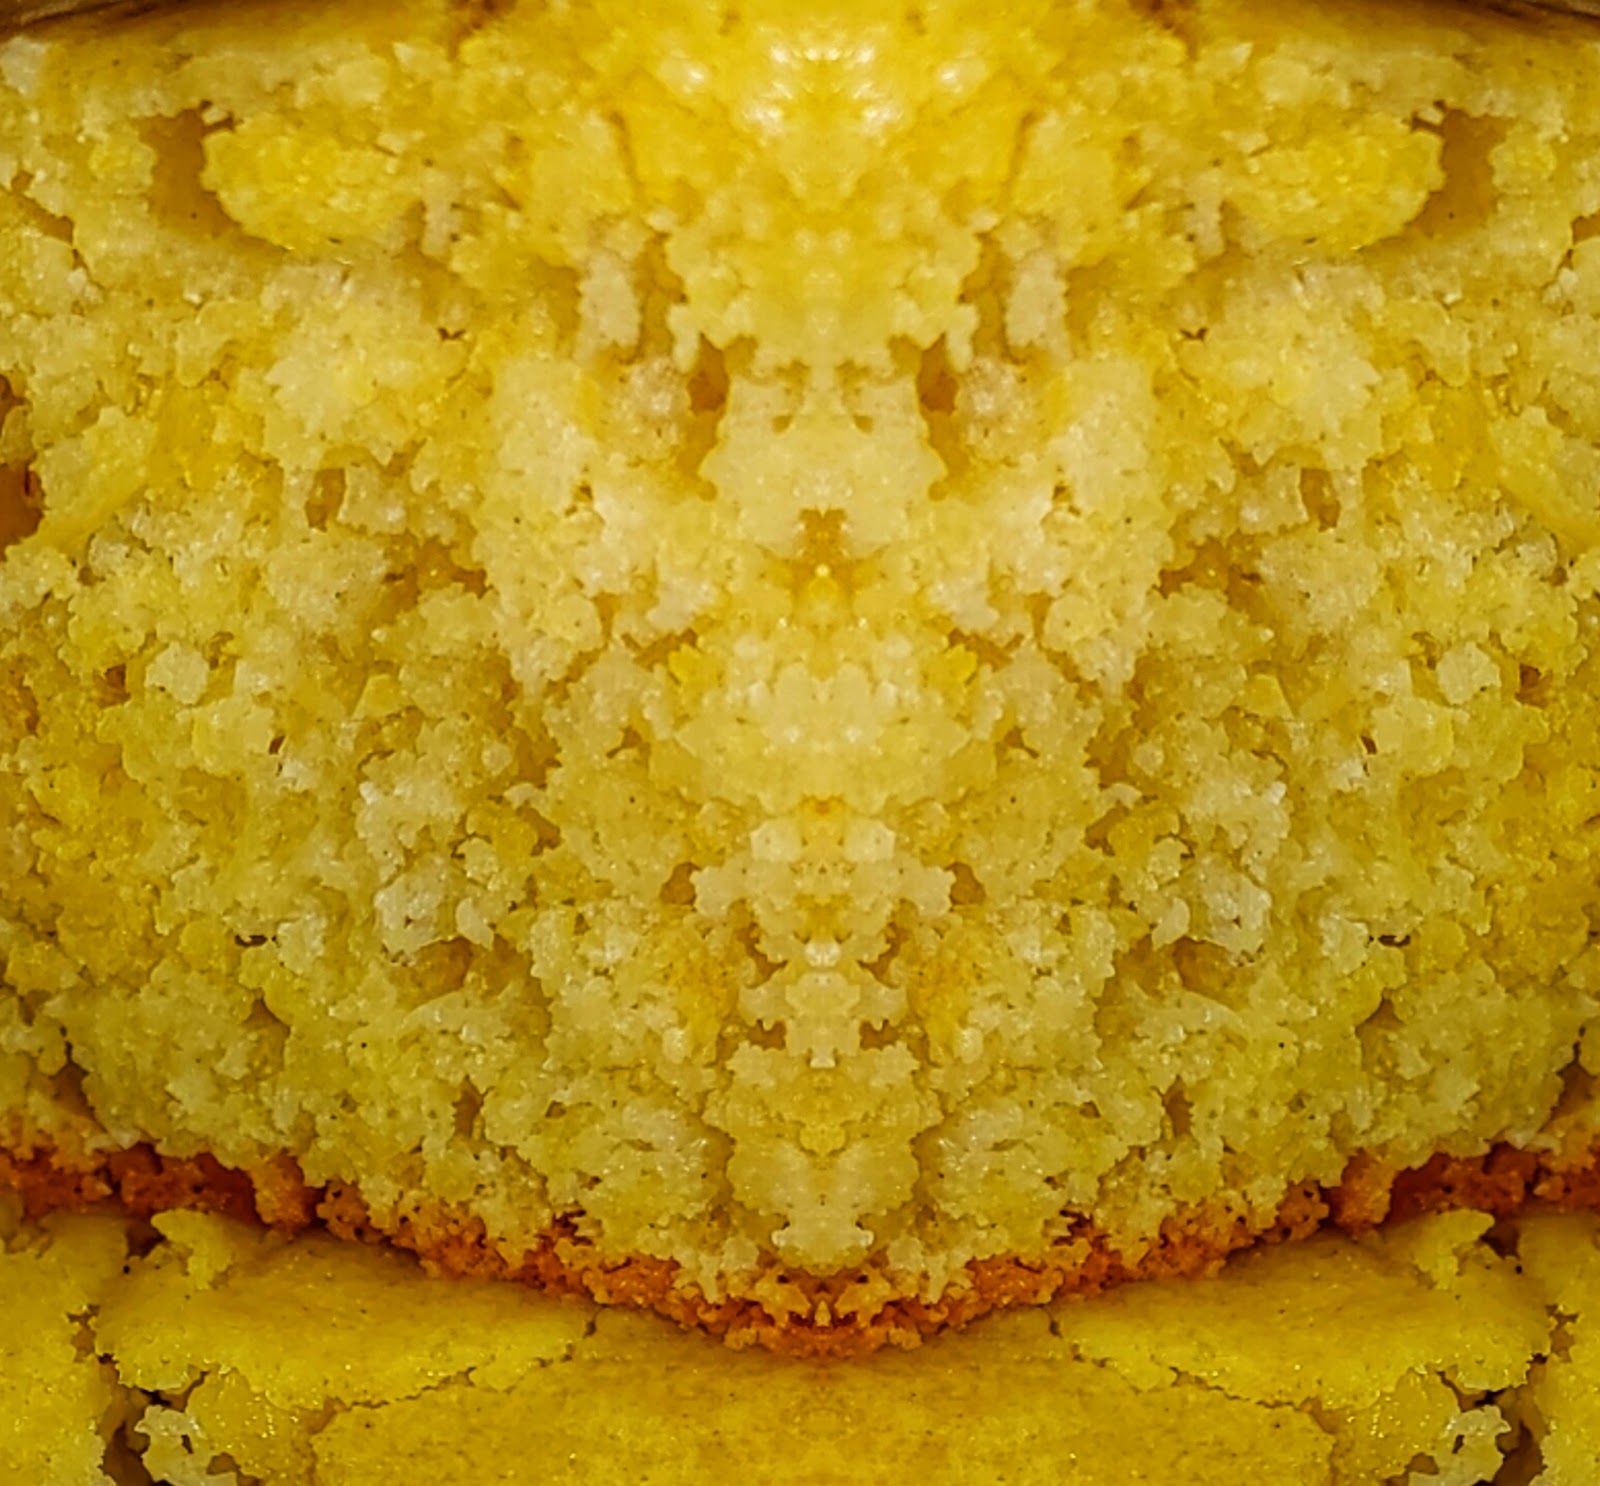
Southern-Style yellow cornbread
There's absolutely nothing more Southern than serving my Southern-Style yellow cornbread with a delicious bowl of pinto or great northern beans!
Ingredients:
•¼ cup of melted butter
•3 eggs
•1 cup of buttermilk or any other type of milk
•1 ¼ cups of yellow cornmeal
•1 cup self-rising flour
•½ cup granulated Splenda or sugar
Instructions:
Preheat the oven to 350 degrees F. Lightly grease a pan. Set aside.
In a medium-sized bowl, add the list of ingredients. Mix with a fork until all the ingredients are well incorporated.
Pour the batter into the prepared pan, and bake for about thirty minutes or until the top and the bottom of the cornbread are golden.

This is the perfect dressing to prepare for the holidays as a main course, or as a yummy side dish. I prepare it much like my normal dressing, but I add diced mushrooms and diced cooked ham instead of using chicken, or turkey. It's completely delicious and I hope y'all will enjoy it!
Ingredients:
•1 pan of baked southern-style yellow cornbread
•4-6 pieces of dried or toasted bread, cut into cubes
•1-2 ham steaks, cooked and diced
•2 chicken, or vegetable bouillon cubes
•1 can of cream of celery soup
•1 can cream of mushroom
•½ cup of butter, plus extra butter to grease your pan
•1 large onion, diced
•4 chives, chopped
•2 teaspoons of dried celery flakes
•1-2 stalks of celery, chopped
•1-½ teaspoons of dried sage
•1 teaspoon of thyme
•¼ teaspoon of oregano
•½ teaspoon of seasoning salt
•1 teaspoon of freshly ground black pepper
•2 to 3 cups of water
•3 eggs whisked
Optional ingredients:
•Cooked sausage
•Sliced mushrooms
•Boiled eggs
Instructions:
So, first make your cornbread the day beforehand.
Cut slices of bread into cubes, transfer to a pan and toast them inside the oven for about eight minutes.
Now, dice your onion, celery, and chives. Set aside.
Grease a large casserole pan with butter on the bottom and sides of your pan.
In a bowl, crumb the baked cornbread with your hands, add the pieces of toasted bread cubes.
Next, add all the spices, the chicken bouillon, or vegetable bouillon, the raw whisked eggs, the cream of celery, and the cream of mushroom soup. Add the diced onions, diced celery, chopped chives and water; stir and combine well. At this point, add the cooked, diced ham; stir well.
Transfer your dressing into your prepared pan.
Now, slice one stick of butter (½ cup) and place it over the top of your dressing. Doing this will make your dressing more flavorful and also keep it from getting too dry.
Bake at 350 degrees F for thirty-five minutes. Serve and enjoy!
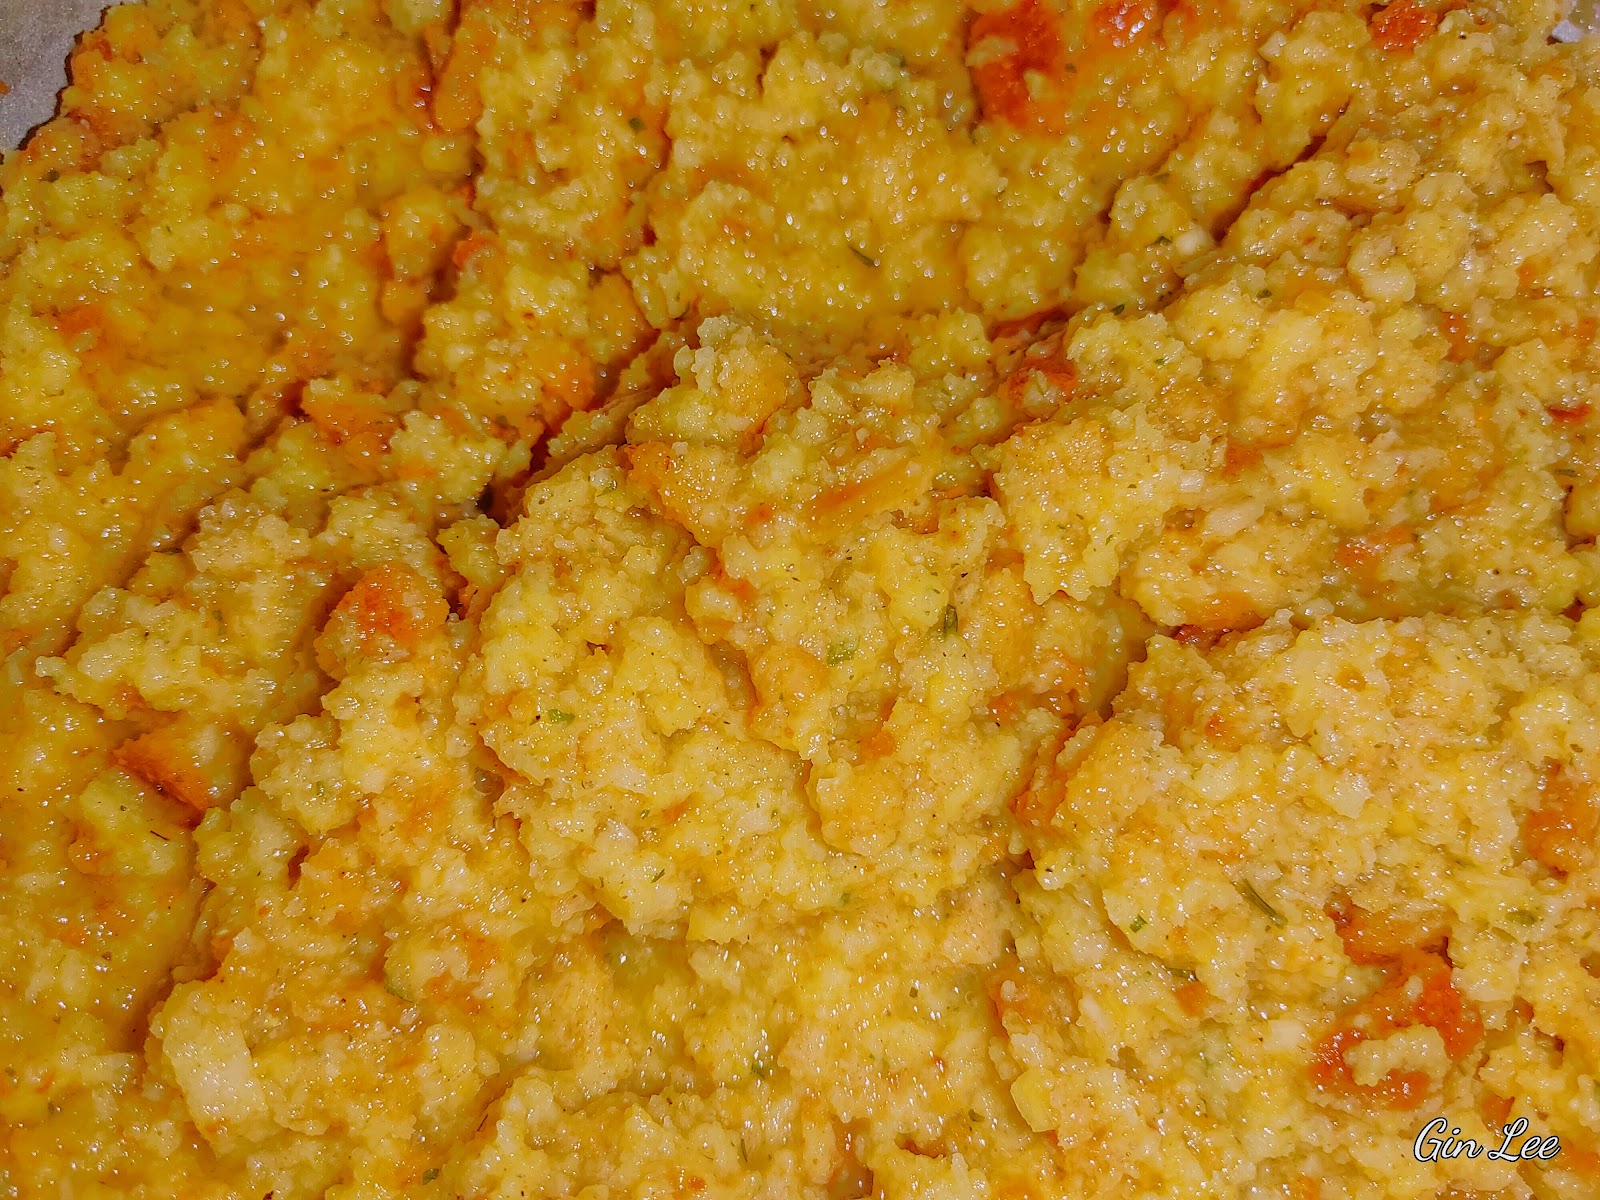
Holiday Dutch oven cornbread dressing
Dutch oven style dressing is a classic holiday recipe (in my home). I always bake my cornbread ahead of time, at least one day in advance, then prepare the rest of my dressing in my Dutch oven the following day. You can totally make the dressing in a casserole dish, or any other pan. I cook my cornbread dressing in a Dutch oven on the burner of my wood stove (to free up the oven space).
Ingredients:
•1 pan of baked southern-style yellow cornbread
•4 pieces of dried or toasted bread cubed into squares
•2 chicken bouillon cubes
•1 can of cream of chicken soup
•1 can of cream of celery soup, or cream of mushroom
•8 tablespoons of butter, plus extra butter to grease your pan
•1 large onion, diced
•4 chives, chopped
•2-3 stalks of celery, finely diced (or use 2 teaspoons of dried celery flakes)
•1-½ teaspoons of dried sage
•1 teaspoon of thyme
•¼ teaspoon of oregano
•½ teaspoon of seasoning salt
•1 teaspoon of freshly ground black pepper
•2 to 3 cups of water
•3 eggs whisked
Optional ingredients:
•Cooked boneless chicken, shredded, or sliced
•Cooked giblets
•Cooked boneless turkey, shredded, or sliced
•Cooked sausage
•Boiled eggs
•Cranberries
Instructions:
So, first you'll need to make your cornbread the day beforehand.
Cut four pieces of bread into cubes, transfer to a cooking tray and toast them inside the oven.
Now, dice your onion, celery, and chives. Set aside.
In a large Dutch oven, or casserole pan, add butter to grease the bottom and sides of your pan.
In a large bowl, crumb the baked cornbread with your hands, add the pieces of toasted bread cubes; stir.
Next, add all the spices, the chicken bouillon, the raw whisked eggs, the cream of chicken soup, the cream of celery, or the cream of mushroom soup, and stir in the diced onions, diced celery, and chopped chives. Add the water and combine well. At this point, you can add any additional add-ins such as cooked chicken, cooked turkey, or cooked giblets, etc..
Transfer your dressing mixture into your prepared Dutch oven, or pan.
Now, slice one stick (8 tablespoons) of butter and place the butter over the top of your dressing.
Bake at 350 degrees F for twenty-five to thirty-five minutes. Serve and enjoy!
About the Author:

Gin Lee is a native of Arkansas. She studied at the Institute of Children's Literature. She is an animal rescuer, food critic, organic gardener, food editor, home cook, food blogger, artist, and a complete do-it-yourselfer. Gin Lee is a published author, journalist, and contributor, among other works, and she resides in a rural town in Arkansas with her husband and their fur babies, Highway, Princess, a flock of Black Australorp chickens, and Stinkpot the turtle.
You can follow her at her food blog, "Cooking Exceptionally With Gin Lee"
https://cookexceptionallyginlee.blogspot.com/?m=1.
Cook Exceptionally With Gin Lee the Deep South Cook "I will show you how to create southern cultural cuisine, desserts, such as cakes, cookies, pies, and teach you the art of candy making, holiday themed recipes, throw in pet recipes (because they're family too), gardening, gardening in greenhouses, etc.. So, sit back, unwind, and relax while I show you how to cook exceptionally and create helpful DIY'S."
