
Water Bath Canning Tomato Sauce

Water bath canning tomato sauce

Yesterday, I canned about 55 pounds of tomatoes. I know, that's a lot of tomatoes! So, I broke my recipe down to make it more manageable for my article today. Each quart jar, on average, will hold about 6 1/2 pounds of tomatoes when you're making tomato sauce. To make my sauce recipe, you'll need a water bath canner or a large enough stockpot that the quart jars can be submerged in. Note also that the water will need to cover the jars by about an inch. This is one of the simplest ways to make homemade tomato sauce because you do not peel, take the seeds, or the core out of the tomatoes. You'll only want to cut the stem portion off the tops of each one.

Ingredients:

  • Tomatoes, an average of 6 1/2 pounds, will be needed per quart.

  • 4 tablespoons of 5 percent white vinegar per quart You can also use 2 tablespoons of lemon juice per quart, or use a dash of citric acid per quart, if you prefer.

  • Spices of your preference (I didn't add any to mine; that way, I will be able to use the tomato sauce for various recipes later on.)

Instructions:

I began by working in batches, washing and quartering the tomatoes, then adding them to my blender. (You can use either a blender, food processor, or food mill to prepare the tomatoes.) I wanted to make my sauce thick, so I only pulsed my tomatoes about four times.


Then I transfer the tomato sauce to a large stock pot and continue to pulse the rest of the tomatoes in my blender until they are all processed.


Then I placed the stockpot over medium-high heat and brought the sauce to a boil.


Once the sauce comes to a rapid boil, I reduce the heat and simmer the sauce uncovered, stirring occasionally. I cooked the sauce for 90 minutes until it thickened.


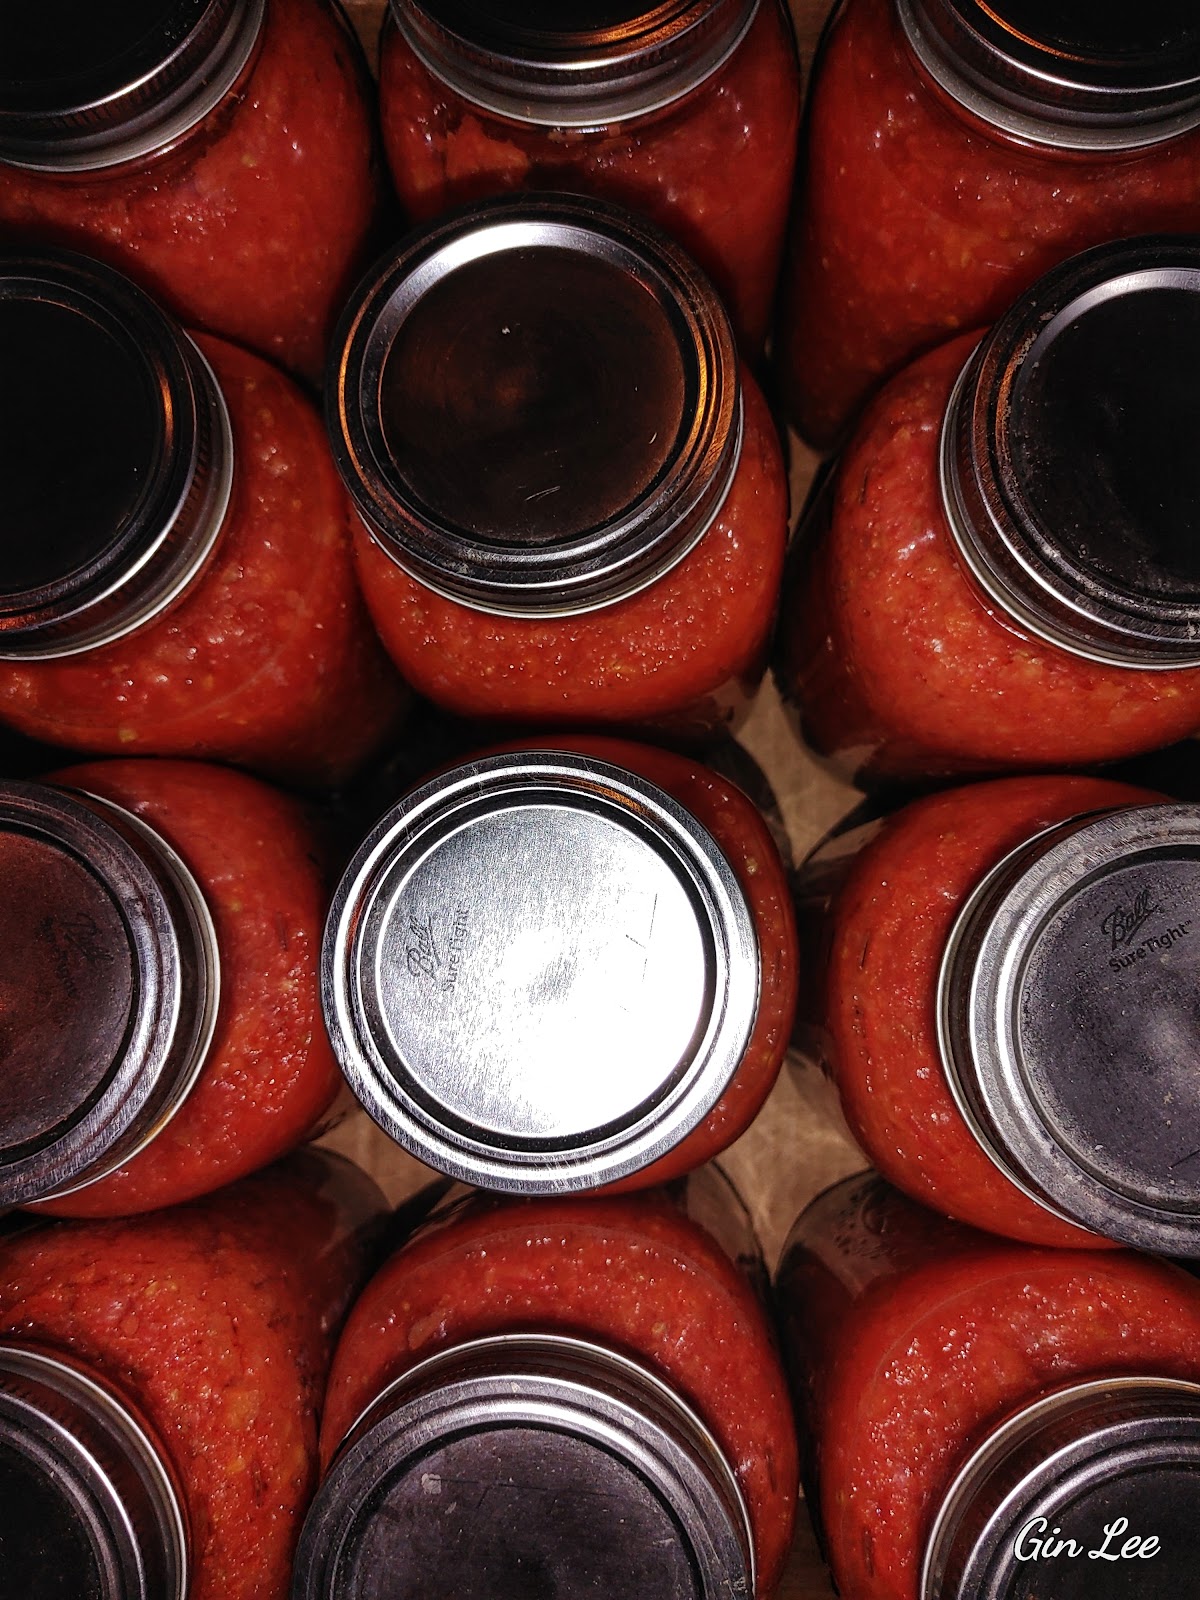
Once the sauce was cooked to my preference, I prepared my water bath canner by filling it with water and 8 quart-sized canning jars. Then I brought the water to a boil to sterilize the jars.


After that, I removed the stockpot from the burner and transferred the hot tomato sauce to the sterilized jars, leaving about 1 inch of headspace.


Next, I stirred in 4 tablespoons of 5 percent white vinegar per quart. You can also use 2 tablespoons of lemon juice per quart, or use a dash of citric acid per quart, if you prefer. Doing this step is crucially important because it is what keeps harmful bacteria from growing inside your jars of tomato sauce. You can add spices and a sweetener of your choice now if you desire.


Then I wiped the jar rims off with a clean paper towel, sealed the jars with lids and ring bands, and processed the jars in a water bath canner for about 40 to 60 minutes. Remember that the jars need to be submerged in water, and the water needs to be an inch above the jars at all times.


Once the tomato sauce was processed, I used canning tongs to lift the jars out of the hot water, placed them on a towel-lined counter, and left the jars to sit overnight. This morning, all the lids were sealed.


Popular posts from this blog

Delicious Baked Sesame Seed Breaded White Fish Recipe

Delicious Baked Sesame Seed Breaded White Fish Recipe Elevate your culinary skills with this delectable recipe for baked white fish coated in a flavorful sesame seed breading. This dish is sure to impress your guests and leave them craving for more. Follow the simple steps below to create a mouthwatering meal that is both delicious and nutritious. Ingredients: 4 white fish filets 4 tablespoons sesame seeds 1 teaspoon garlic powder 1 teaspoon paprika Seasoning salt and freshly ground black pepper to taste 2 tablespoons olive oil Instructions: Place the sesame seeds, garlic powder, paprika, seasoning salt, and freshly ground black pepper in a shallow dish and mix well. Brush each fish filet with olive oil and then coat them in the sesame seed mixture, pressing gently to adhere. Place the coated filets on a greased baking tray. Bake in a 400-degree oven for 20 minutes, or until the fish is cooked through and the coating is crispy and golden brown. Serve hot and enjoy your delicious baked ...

Delicious Honey Divinity With Chopped Pecans

Delicious Honey Divinity With Chopped Pecans The holidays just wouldn't be the same at my house without a batch of homemade divinity. This sweet treat is decadent, light as air, and absolutely delicious! If you encounter challenges while preparing my divinity recipe, please refer to the end notes for troubleshooting tips. The technique I am sharing is effective for all divinity recipes that do not yield the desired results. Ingredients: • 2 cups of granulated Splenda or granulated white sugar • 5 tablespoons and 1 teaspoon (1/3 cup) of premium honey • 5 tablespoons and 1 teaspoon (1/3 cup) of water • 2 egg whites, beaten to soft peaks • 1 1/2 cups of chopped pecans, chopped Maraschino cherries, or chocolate chips Instructions: Here's a fun and easy recipe for making delicious divinity candy! First, grab a heavy-bottomed pan and mix together granulated Splenda or sugar, honey, and water. Boil the mixture until it reaches a hard ball stage. To test if it's ready, drop a small...

Growing Vegetable Plants in Rockwool Cubes

Growing Vegetable Plants in Rockwool Cubes Hey there, fellow gardeners! Today we're going to talk about a cool way to grow your own vegetables using rockwool cubes. It may sound fancy, but it's actually pretty simple and fun. Let's dive in! What You'll Need: First things first, you'll need some rockwool cubes . These are like little sponges that help your plants grow strong and healthy. You'll also need some vegetable seeds, a tray to hold the cubes, and water. I personally use these hydroponic grow trays with dome lids. Step 1: Soak the Cubes Before you plant your seeds, you'll need to soak the rockwool cubes in water. This helps them absorb moisture and provides a good environment for your plants to grow. Step 2: Plant Your Seeds Once your cubes are nice and soaked, it's time to plant your seeds. Make a little hole in the top of each cube and drop a couple of seeds in. Some seeds are so tiny and I generally end up planting more than two in each cube. ...