
Yummy Piggy Wraps (Homemade Corn dogs)

Yummy Piggy Wraps

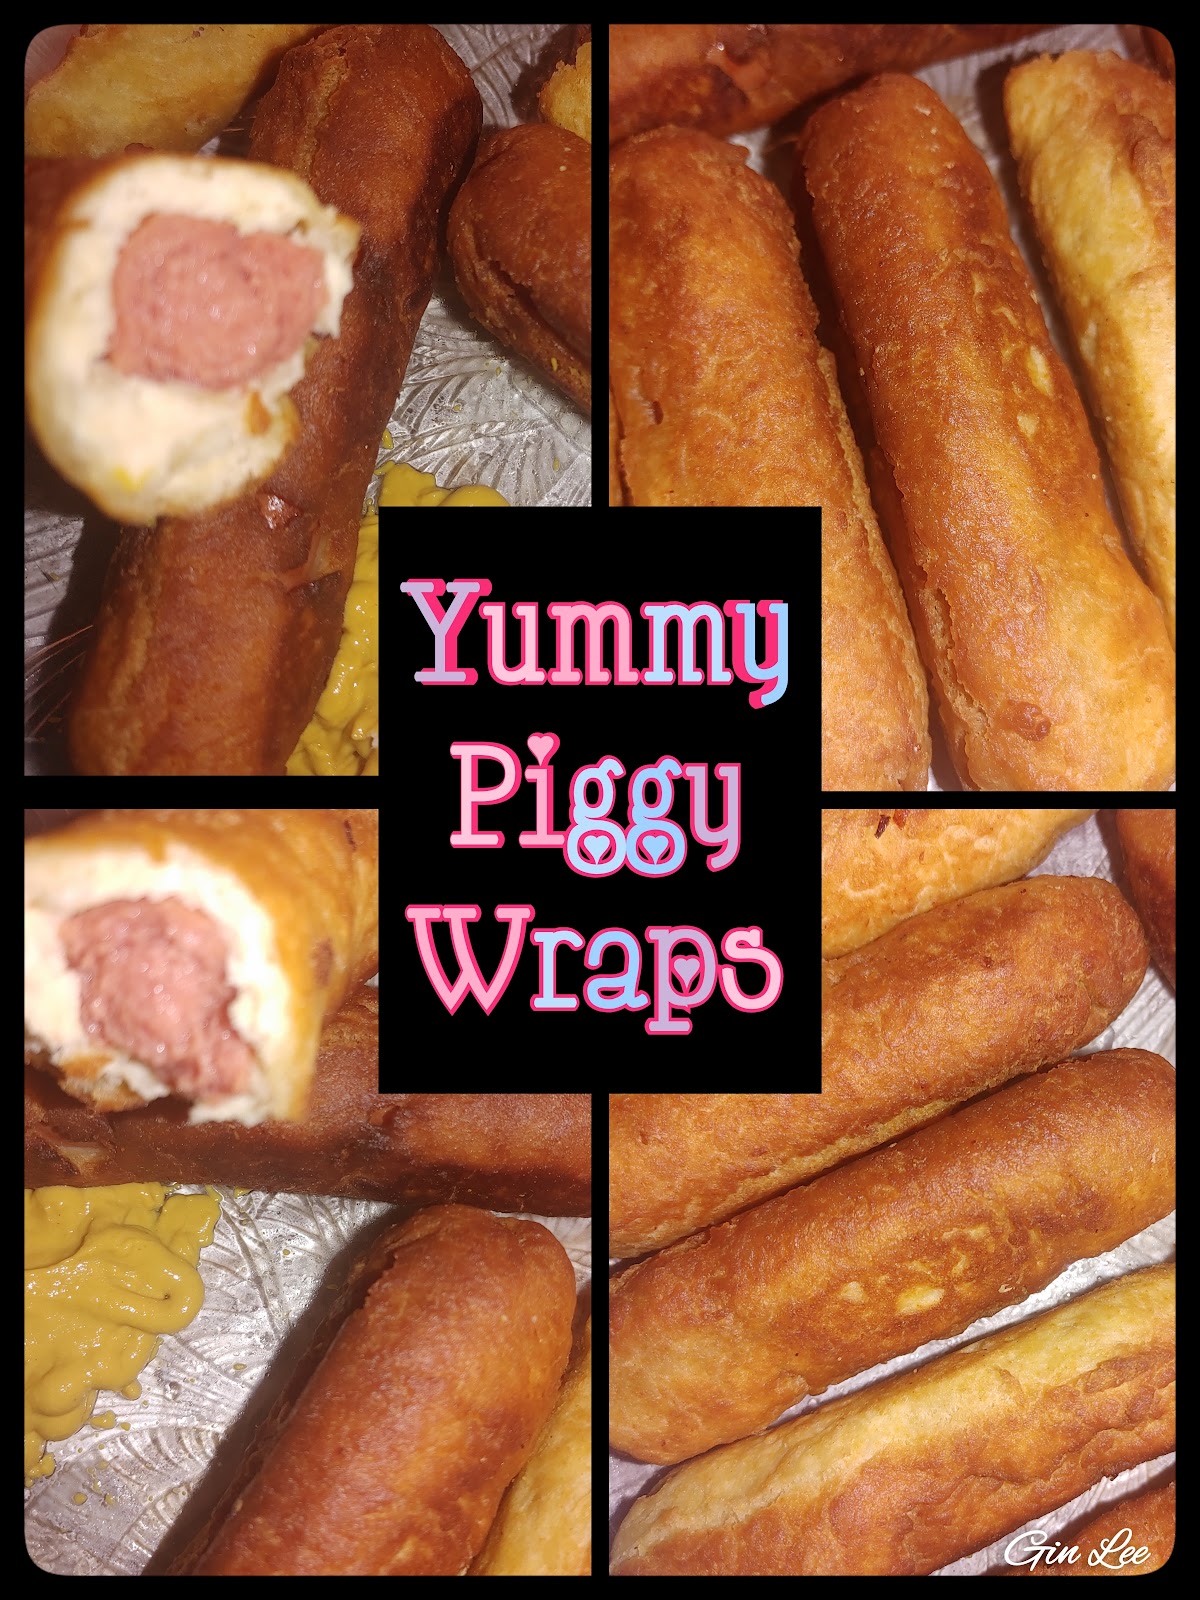
If you are a fan of store-bought corn dogs, then you will absolutely adore my delicious piggy wraps recipe. My husband even claims that my recipe tastes just like the ones you find in the store. I encourage you to give it a try and experience the true deliciousness for yourself!

Ingredients:

  • 1 cup of dry pancake mix (homemade or store-bought)

  • About 1/4 cup of water, plus a little more if needed

  • 1 (8-count) package of weiners

  • 1/2 cup canola oil for frying

Instructions:

In a bowl, combine 1 cup of dry pancake mix with 1/4 cup of water. Mix well and knead the dough until it reaches the right consistency. If the dough is too dry, add a little more water until it comes together without being too sticky or wet.

Roll the dough into a log shape and cut it into 8 equal segments.

At this point, I patted and shaped each segment of dough into long rectangular shapes with my hands. I didn't use any flour to do this part. The dough segments should be just a little bit longer than each weiner, and it needs to be wide enough to wrap around the entire width of the weiner. After wrapping the dough around each weiner, I molded the dough around each end and then rolled each wrapped weiner with my fingers on a clean glass plate to seal the dough completely.

Heat 1/2 cup of canola oil in a large skillet over medium-high heat until hot and bubbling.

Fry the piggy wraps in batches, cooking three at a time to ensure there is enough space in the skillet to brown all sides of the dough.

Once the dough is golden brown, remove the piggy wraps from the oil and drain any excess on a paper towel-lined plate.

Serve and enjoy!

Note:

Below is the ingredients for my homemade pancake mix recipe:

  • 2 cups of self-rising flour

  • 2 tablespoons of Splenda or sugar Add more if you prefer your pancakes to be sweeter.

  • 2 cups of powdered milk

  • 1/4 teaspoon of no-salt substitute, or salt

Prepare the pancake mix in advance and store it in Mason jars or Ziploc bags.


Popular posts from this blog

Growing food in the winter inside a low tunnel

Growing food in the winter inside a low tunnel When winter arrives and the ground becomes frosty, many gardeners assume that growing fresh produce is out of the question until spring. However, with the help of low tunnels, it is possible to continue growing food throughout the cold season. Low tunnels, also known as hoop houses or mini greenhouses, provide a protected environment that shields plants from harsh winter conditions while allowing sunlight to reach them. In this article, we will explore the benefits of using low tunnels for winter growing, discuss the selection of suitable crops for this purpose, and provide guidance on soil preparation, temperature management, irrigation techniques, pest control, and strategies for extending the winter growing season. By embracing the possibilities of low tunnels, you can enjoy a bountiful harvest even when the temperatures are cold outside! What is a low tunnel? Winter can be a challenging time for gardeners, but with the help of low tunn...

Grandma Ball's Easy Caramel Pie

Grandma Ball's Easy Caramel Pie Introducing Grandma's Easy Caramel Pie! This delectable dessert is a timeless classic that I discovered in my grandmother's handwritten recipe book. As we approach the holiday season, I am thrilled to share some of her vintage recipes with all of you. Get ready to indulge in a slice of nostalgia with this mouthwatering treat! Ingredients: 1 can of Eagle Brand sweetened condensed milk 1 pre-baked 9-inch pie crust Instructions: Place the can of Eagle Brand sweetened condensed milk in a saucepan with a lid. Fill the saucepan with water until the can is completely submerged.  Bring the water to a boil and let the milk simmer in the can for 3 hours. Be sure to check regularly to ensure the can remains covered with water, adding more water as needed. Allow the can of milk to cool before carefully pouring it into the pre-baked pie crust. Use a spatula to create a smooth and visually appealing finish on the pie. This delectable caramel pie is a timel...

Chicken Cheese Ball

Chicken Cheese Ball This delectable recipe is perfect for serving as a Mother's Day hors d'oeuvre appetizer or at any family, church, or holiday dinner gathering. Ingredients: 1 1/2 cups finely diced, well-seasoned, skinless, boneless cooked chicken 1 cup softened Velveeta cheese 1/4 cup mayonnaise 1 cup crushed, roasted nuts and seeds (optional) 1/4 cup chopped chives (optional) Instructions: For this recipe, cold leftover chicken works wonderfully. I used two chicken thighs and two chicken legs that had been cooked the previous evening. Begin by finely dicing the skinless, boneless, cooked chicken and setting it aside. In a bowl, combine 1 cup of softened Velveeta cheese and 1/4 cup of mayonnaise. Mash the mixture with a fork until it is creamy and well combined. Add the diced chicken to the cheese mixture and stir well. Then, using clean hands, roll the mixture into a ball. For added texture and flavor, you can roll the cheeseball in 1 cup of crushed, roasted nuts and seeds ...