
Grilled Pork Strips

Grilled Pork Strips Recipe for Your Fourth of July Cookout

Are you looking to impress your friends and family at your Fourth of July cookout? Look no further than this recipe for grilled pork strips! With just a few simple steps, you can turn ordinary pork loin chops into mouth-watering strips that will have everyone coming back for more.

A Cost-Effective Way to Serve Meat

Not only is this recipe delicious, but it's also a cost-effective way to serve meat at your cookout. Pork loin chops are typically more affordable than other cuts of meat, making this recipe a budget-friendly option for feeding a crowd.

Ingredients:

  • 4 to 6 thick-cut pork loin chops

  • 2 tablespoons of olive oil

  • 1 teaspoon of onion powder

  • 1 teaspoon of garlic powder

  • 1 1/2 teaspoons of smoked paprika

  • 1 to 2 tablespoons of honey

  • Freshly ground black pepper, to taste

  • Seasoning salt, to taste

Instructions:

Begin by preheating your grill to ensure it reaches the optimal temperature for cooking.


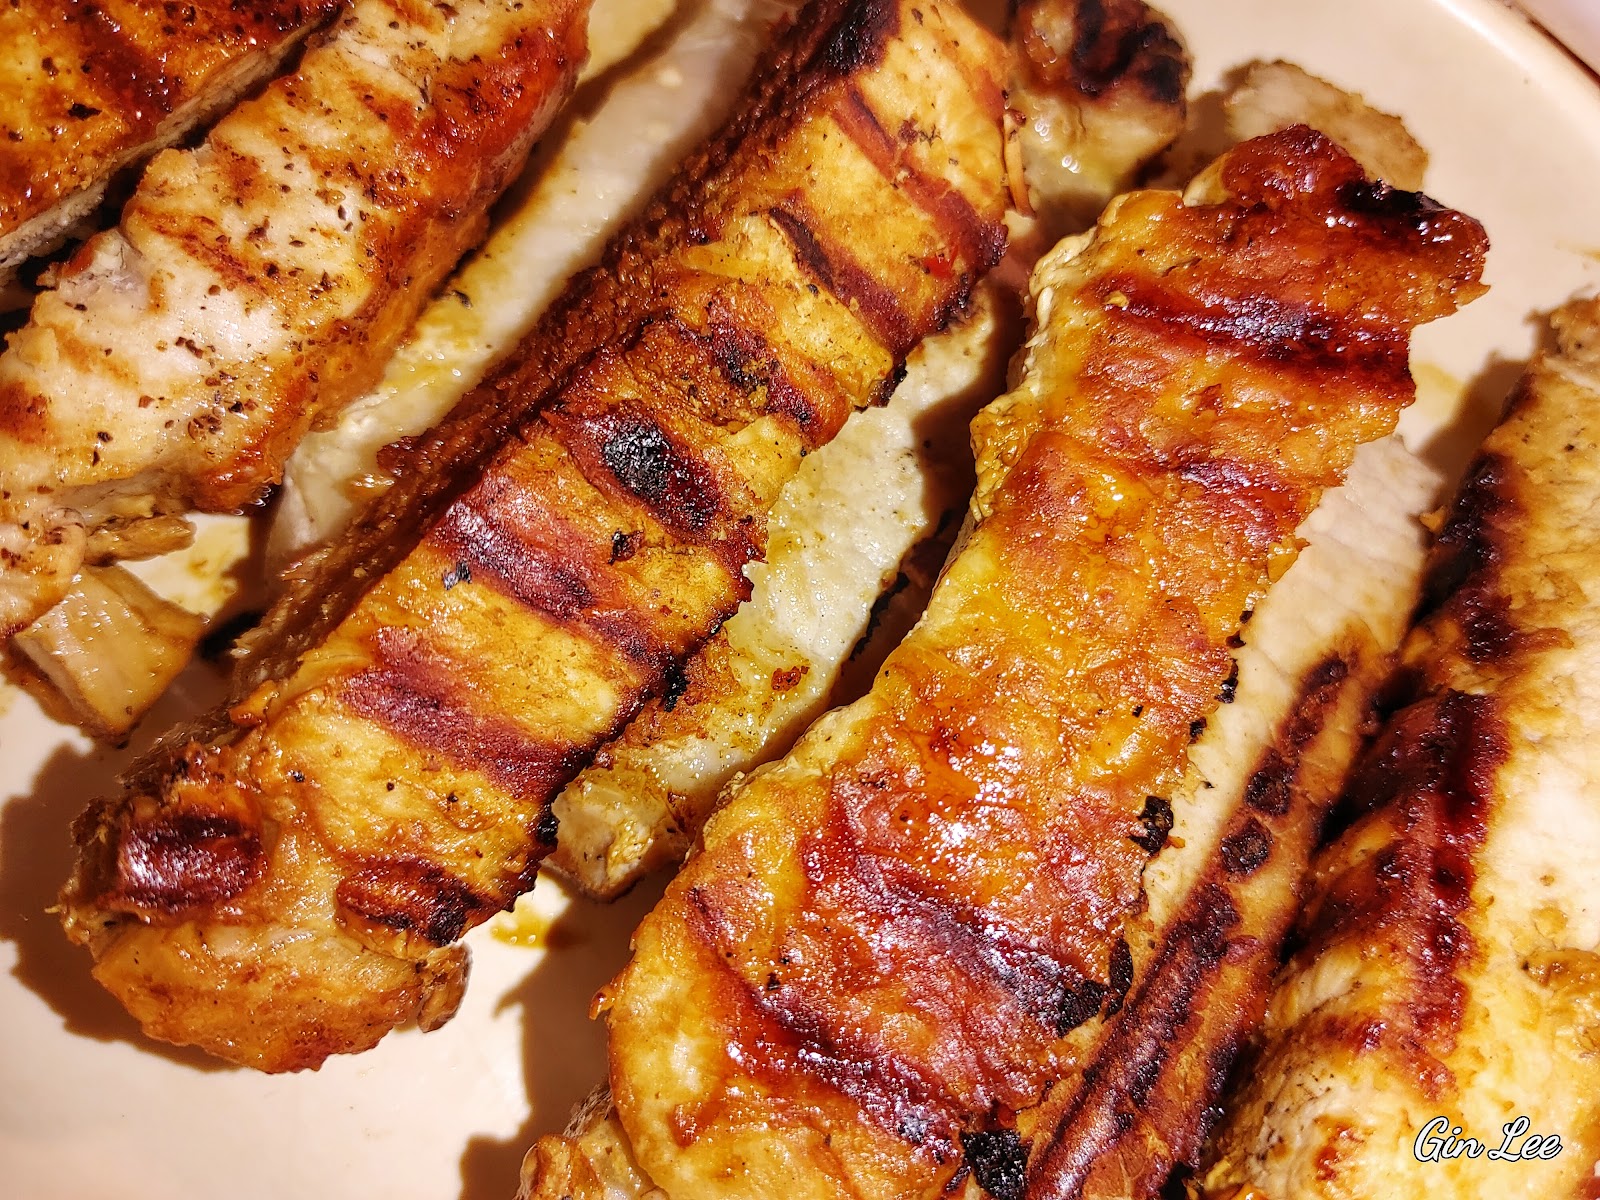
Cut the pork loin chops into three equal pieces lengthwise to create strips.


In a small bowl, combine 2 tablespoons of olive oil, 1 teaspoon of onion powder, 1 teaspoon of garlic powder, 1 1/2 teaspoons of smoked paprika, and 1 to 2 tablespoons of honey. Mix well to create a flavorful marinade.


Using a BBQ brush, generously coat each pork strip with the marinade on all sides. Then sprinkle the desired amount of freshly ground black pepper and seasoning salt to taste.


Place the pork strips on the hot grill and cook them over direct medium-high heat. Remember to flip the strips as needed to ensure even cooking. Cook for approximately 5 to 7 minutes per side, or until the pork is fully cooked.


Serve the grilled pork strips alongside classic sides such as potato salad and baked beans for a complete and satisfying meal.


I wish you and your loved ones a safe and enjoyable Fourth of July celebration filled with delicious food and good company!


Popular posts from this blog

Why I Don't Preheat My Oven Before Cooking"

"Why I Don't Preheat My Oven Before Cooking" In this article, I aim to shed light on my unconventional approach to cooking by explaining the reasons behind why I choose not to preheat my oven. While this may seem like a peculiar practice to some, I assure you that there are valid reasons behind it that I will explore in the following sections. Safety Considerations: Addressing concerns about food safety and doneness Ensuring proper internal temperature: Using a food thermometer One of the common concerns when it comes to skipping preheating is whether the food will cook evenly and reach a safe internal temperature. However, I have found that using a food thermometer effectively eliminates this concern. By inserting a thermometer in the thickest part of the dish, I can ensure that it reaches the recommended temperature for doneness. This method not only guarantees food safety but also prevents overcooking. Adhering to recommended cooking times for specific foods Another mi

American pokeweed

American pokeweed  American pokeweed is a perennial, and it's commonly known as a survivalist plant. The plant is often referred to as poke salad, poke sallet, pokeweed, poke, among a few others. During the first days of spring, purplish shoots of pokeweed emerge from the soil. The plant will often pop up as a volunteer, and depending on the location, pokeweed can grow anywhere from 6 feet to 20 feet tall. The stalks and stems of pokeweed are an attractive purplish plum color. The leaves are a beautiful green color, and they can grow as big as 14 inches long by 7 to 8 inches wide. The plant's leaves will be tapered at each end. By summer, pokeweed begins producing long clusters of green and white flowers. The flowers turn into green berries that then transition from a light pink to a dark plum color. Pokeweed grows flowers and berries often at the same time and will continue to grow until the first frost. I have never pulled a pokeweed plant up from its roots, but I

I tried Martha Stewart's slow-cooker triple chocolate brownies recipe- this is how they turned out

I tried Martha Stewart's slow-cooker triple chocolate brownies recipe- this is how they turned out There's one lady on this earth (besides mom) that I have always simply adored; Martha Stewart. Anyone who knows me knows that Martha has been my lifelong hero since I was a teenager. She's witty, beautiful, and exceptionally talented in so many various ways. Such as DIY home and land renovations to whipping up any tantalizing masterpiece in her kitchen.  Even though I have a multitude of recipes, I had never made  slow-cooker triple chocolate brownies  before. That's until I came across Martha Stewart's recipe for this delightfully delicious, gooey chocolate treat. I followed Martha's techniques and her recipe to the tee, and ooh-la-lah! Her slow-cooker triple chocolate brownies are sinfully exquisite. They are a chocolate lover's dream come true. Martha's slow-cooker brownie recipe takes 3-1/2 hours to bake. While some people may think that is too long to