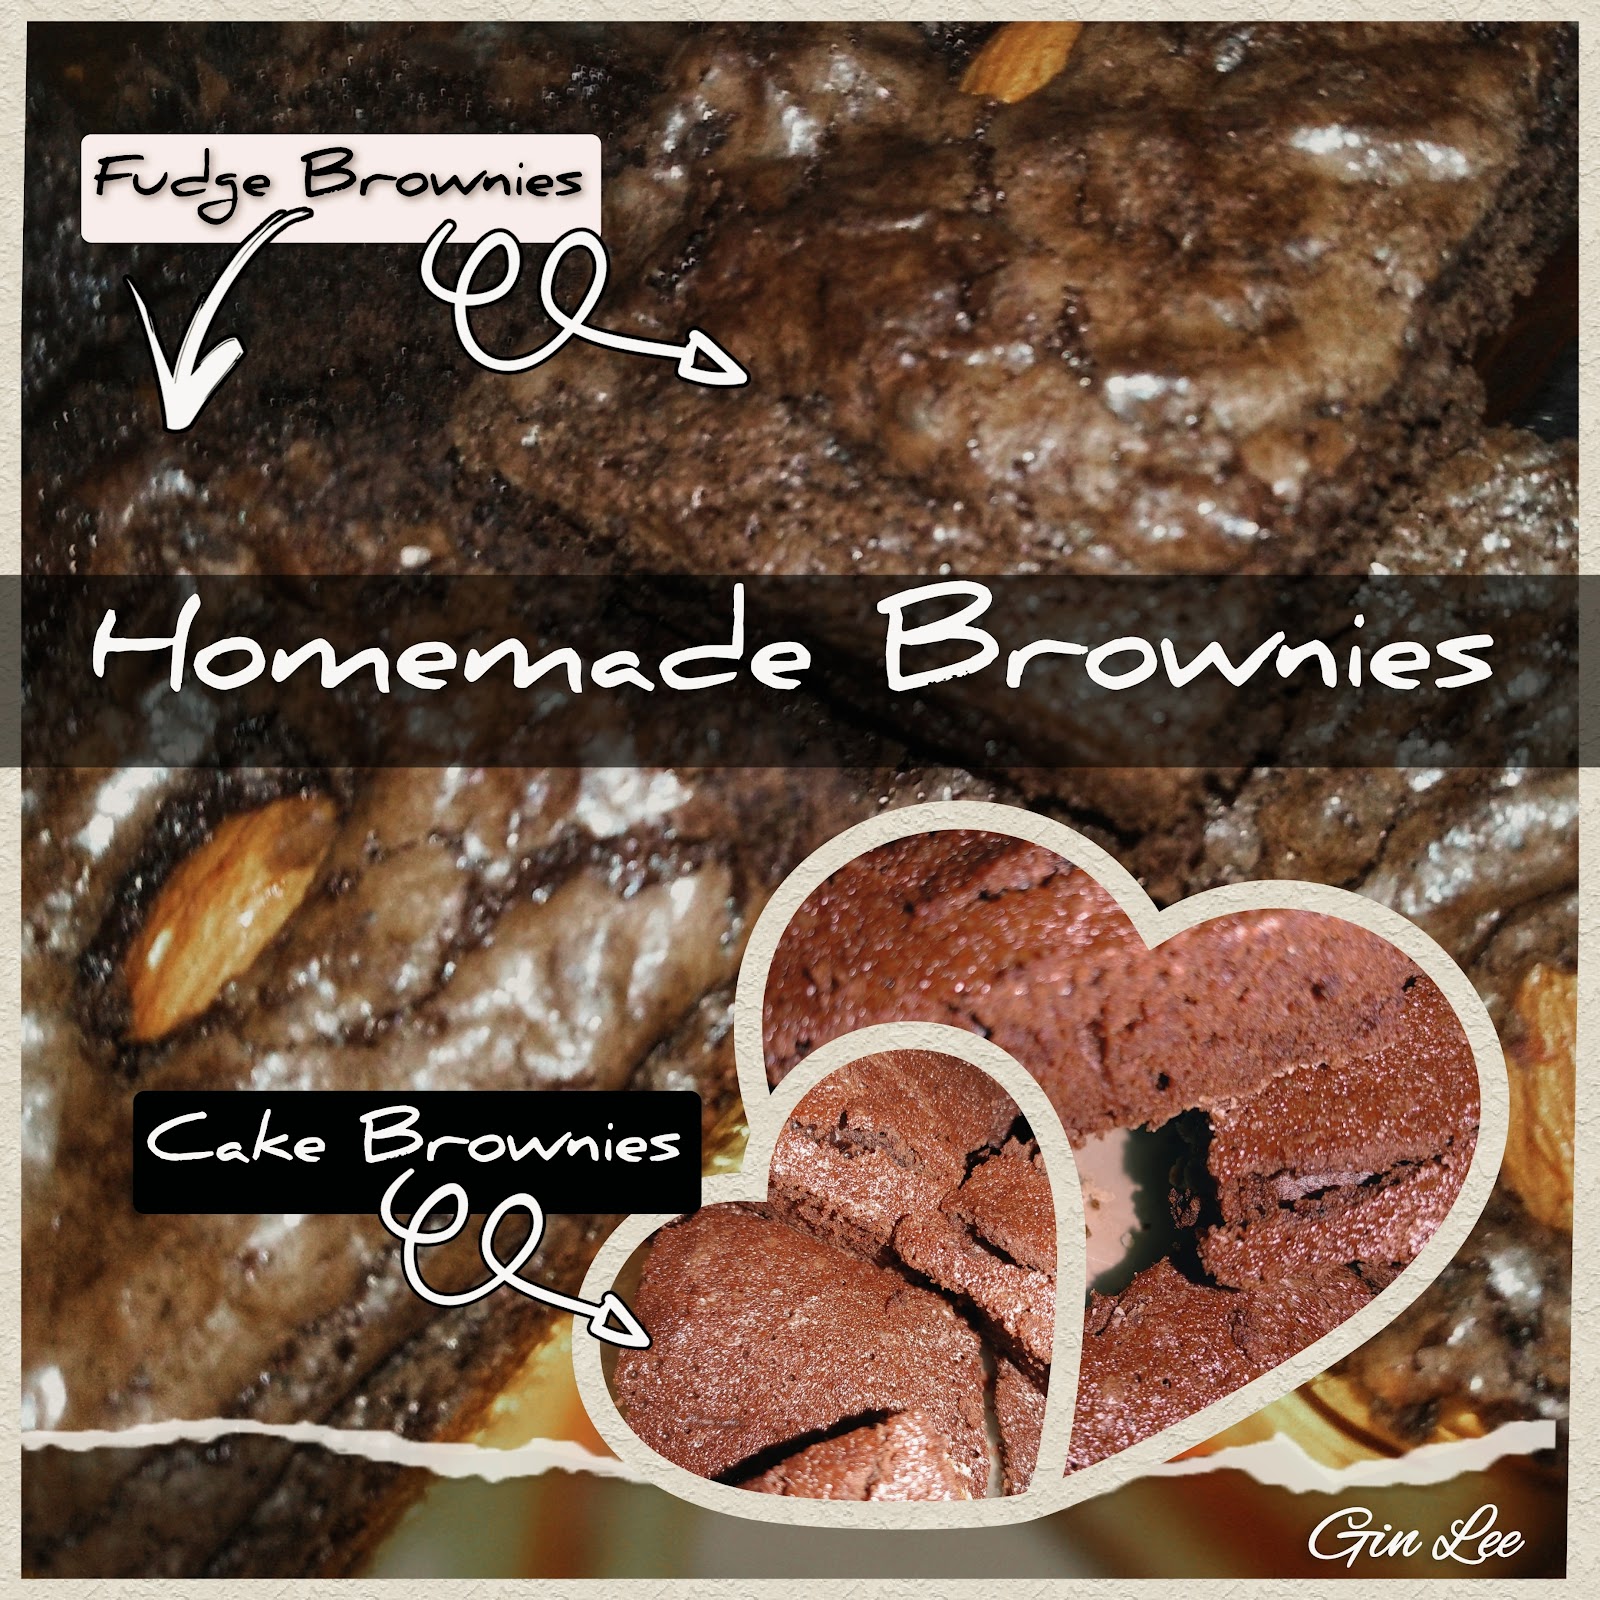
Homemade brownies

Homemade brownies

Here's a quick fix for a boring day! Homemade fudge brownies never fail to tempt and bring delight. Today, I will tell you how you bake brownies in different ways for different brownie results. Some people prefer cake-like brownies, while other people prefer a more dense-like, rich, and fudgy brownie, while some people like their brownies to be either crispy around the edges, or chewy. Today, I will walk you through each step to teach you how to bake the perfect fudge brownie that you prefer.

Cake brownies

Ingredients: 

  • ¾ cup of cocoa powder

  • 1-¼ cup of Splenda, or sugar

  • ½ cup of all-purpose flour

  • ½ teaspoon of salt

  • 2 large eggs

  • ¼ cup of canola oil

  • 2 tablespoons of water

  • 1 tablespoon of pure vanilla extract (optional)

Instructions:

Grease and lightly dust flour in a square baking pan; set aside. If you prefer thinner brownies, use a 9x13 inch pan.


In a bowl, add and mix the flour, Splenda (or sugar), salt, and cocoa powder together. Then add the eggs, water, pure vanilla extract (optional), and canola oil; mix well. I didn't break out my mixer for my batter, instead I used a big spoon and gave the batter a good fifty stirs.


If you want your brownies to turn out more dense and richer, beat your eggs separately, for a longer period, then add them in with the other ingredients. Mixing the batter longer also will result in a super crusty, shiny top crust.


Next, pour your batter into your prepared pan and bake your brownies in the oven for about twenty-two minutes. 


Read below so you'll know which temperature that you'd prefer. Plus, continue reading to get the recipe for my fudgy brownies. The temperature matters just as much as the ingredients in regard to what type of brownies that you'll end up with.


Cooking your brownies at a higher temperature (375 degrees F) will make the outside edges kinda crispy and the center of the brownies will be more fudgy.


For fudgy brownies

Ingredients: 

  • ¾ cup of cocoa powder

  • 1-¼ cup of Splenda, or sugar

  • ½ cup of all-purpose flour

  • ½ teaspoon of salt

  • 3 large eggs

  • ¼ cup of canola oil

  • 2 tablespoons of milk

  • 1 tablespoon of pure vanilla extract (optional)

  • 1 stick of melted butter equals 8 tablespoons, or  ½ cup

  • 6-ounces of chocolate chips, baking chocolate, or chocolate bark (6-ounces equals ¾ cups, or 12 tablespoons)

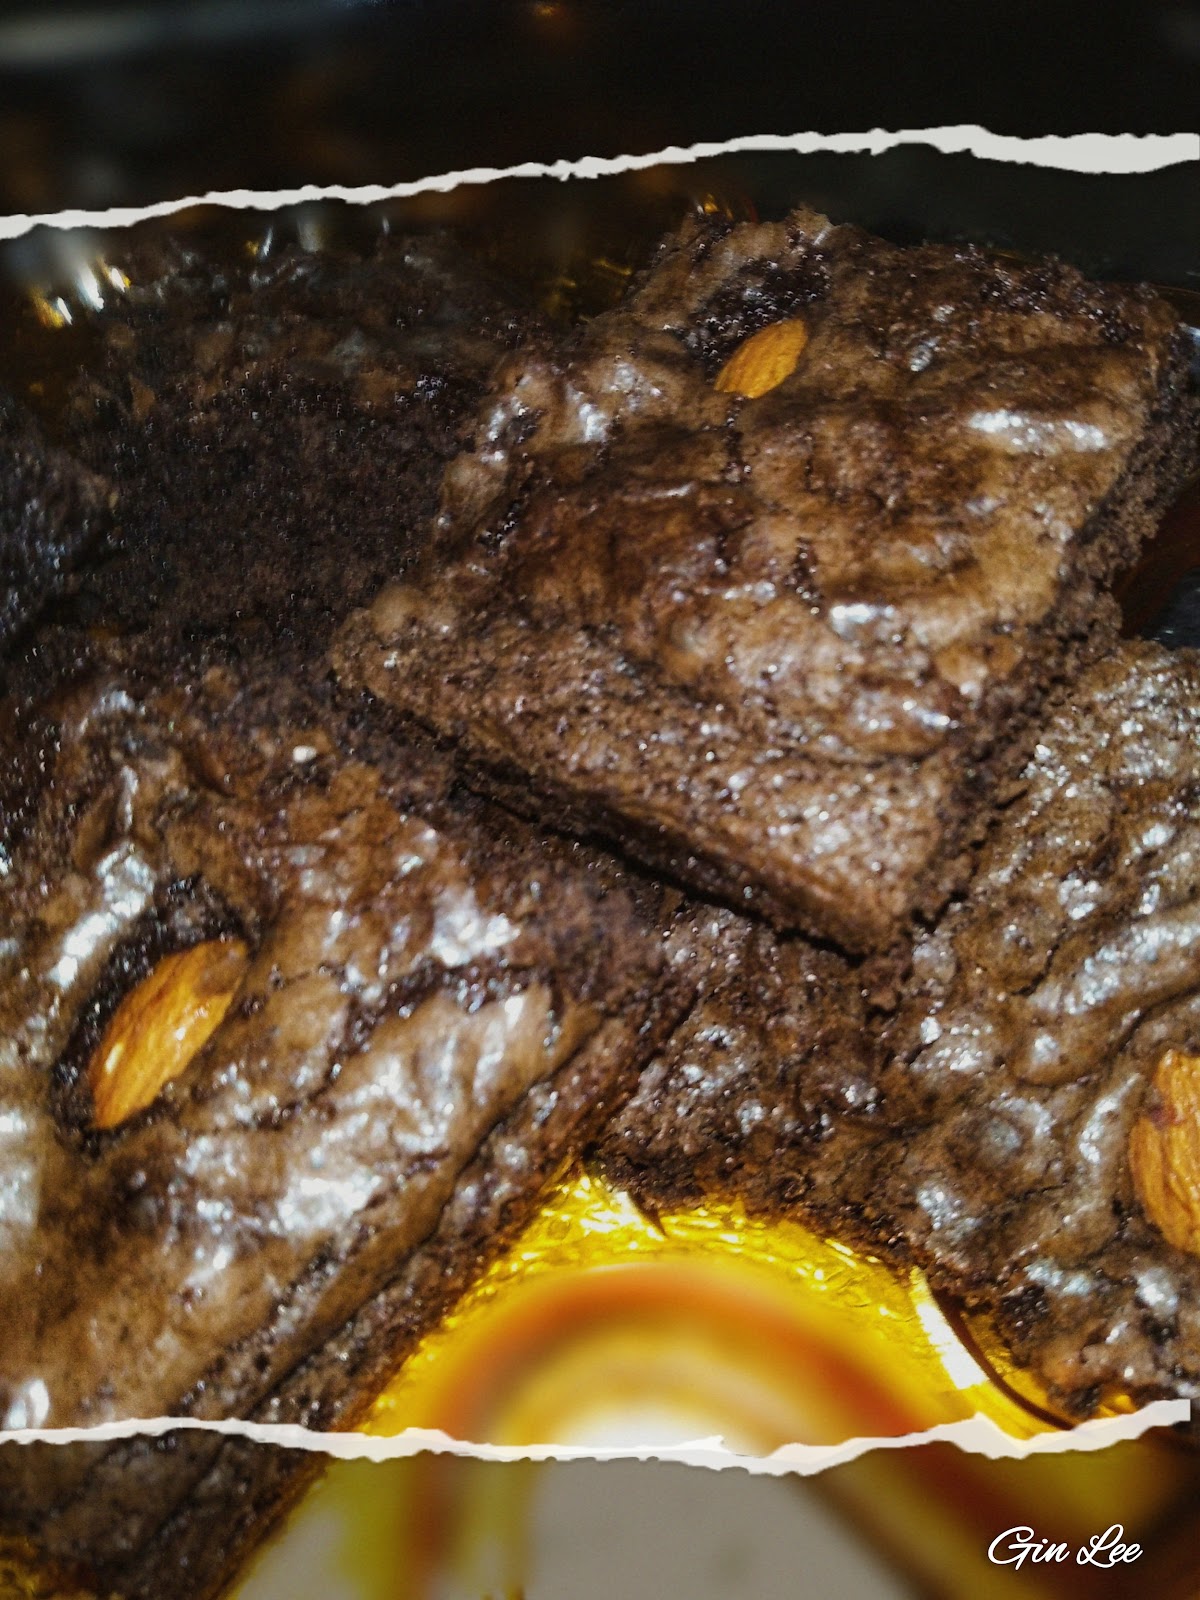
  • ½ cup of almonds, or other nuts (to add on the top of the batter once it's poured into the prepared pan) (optional)

Instructions:

Grease and lightly dust flour in a square baking pan; set aside. If you prefer thinner brownies, use a 9x13 inch pan.


In a bowl, add and mix the flour, Splenda (or sugar), salt, and cocoa powder together. Then add the milk, pure vanilla extract (optional), and canola oil; mix well.


Melt the chocolate and butter together in a saucepan, or in a microwave-safe bowl in the microwave. Slowly beat the buttery chocolate mixture into the flour mixture.


Next, add the eggs slowly, one at a time, while mixing. Adding the third egg in your batter here will not make cakey brownies, because you're adding the melted butter and chocolate into this recipe. 


Pour the batter into the prepared pan. Add the almonds, or your preferred nuts on top of the brownie batter (before baking) so that there's at least one almond on each brownie. (This is optional.) 


Bake in a 375 degrees F oven for about twenty-two minutes.

Notes:

If you prefer to have your brownies more cake-like consistency, bake at a lower temperature of 350 degrees F. You may also add in another egg if you prefer your brownies being even more cake-like. However, your brownies will not be as moist.


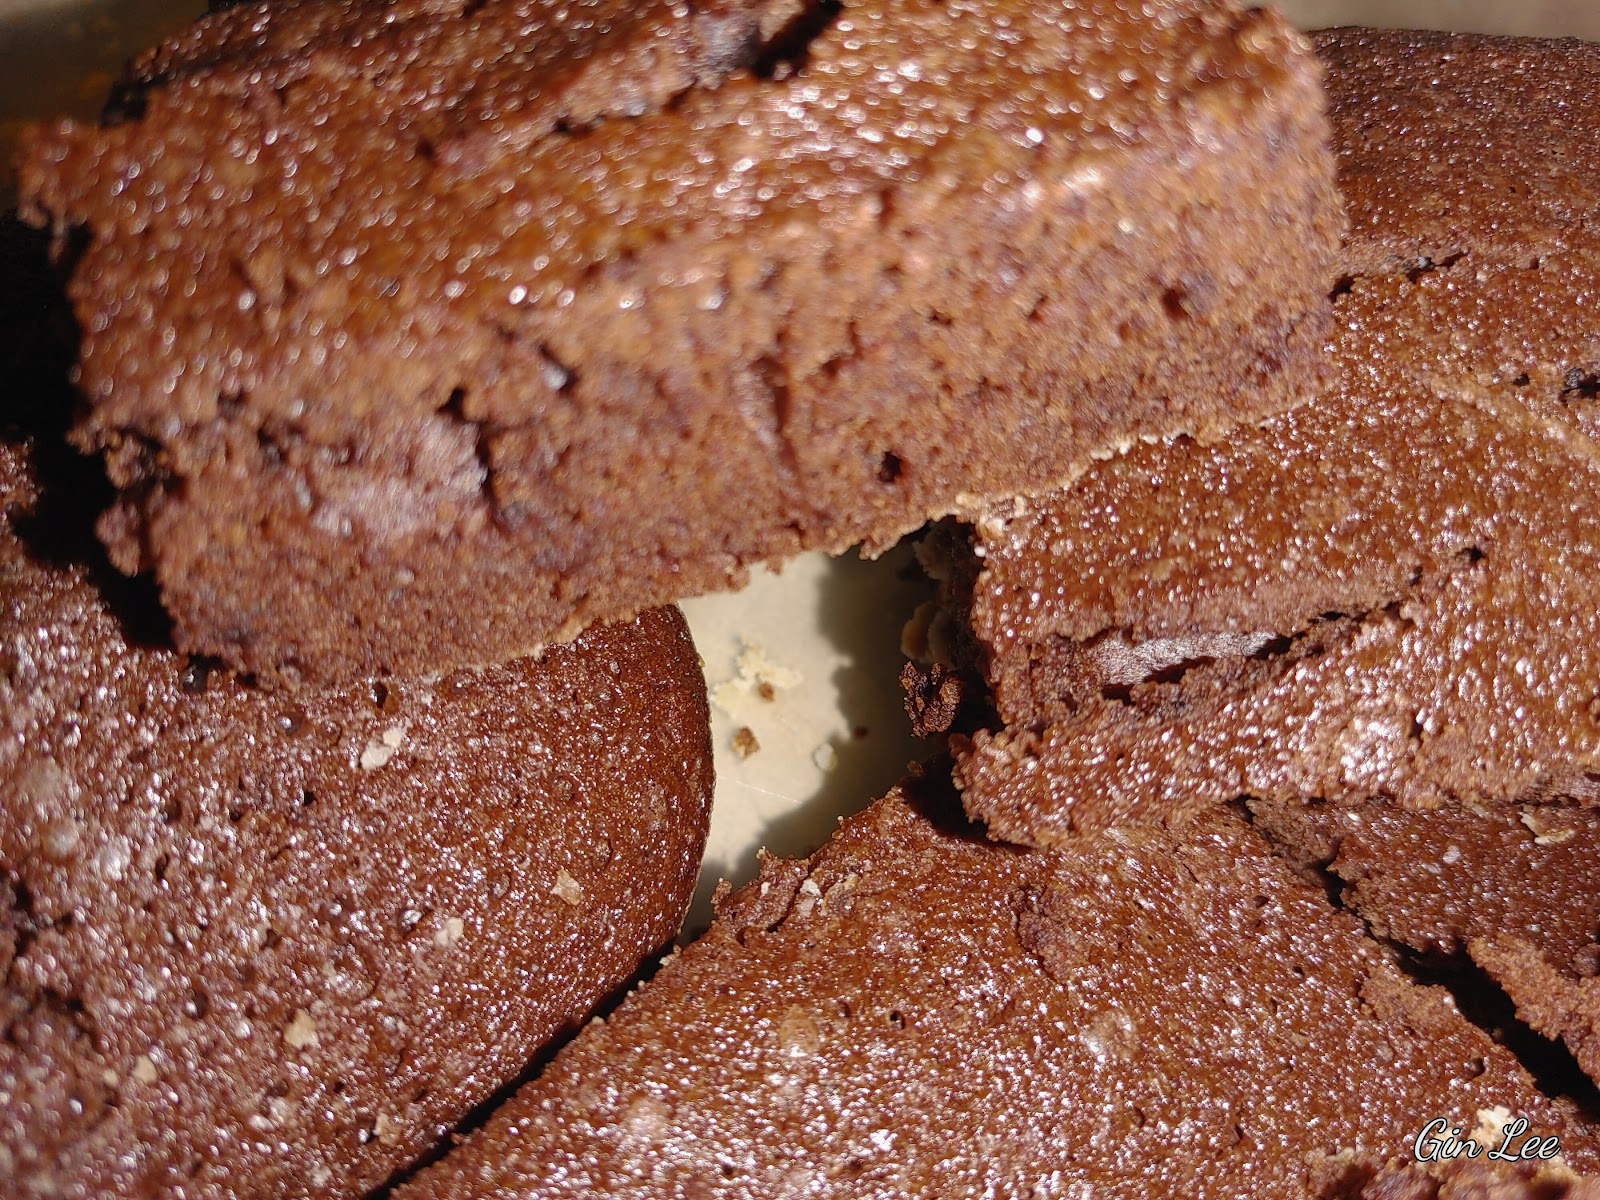
For nice moist brownies, don't over bake. When a toothpick is inserted, it will not come out completely clean and it should have bits of cooked brownie on it. If you don't have brownie crumbs on your toothpick, you have over-baked them. Keep in mind that you're baking brownies, not a cake. (When baking a cake, a toothpick should pull out clean (with nothing on it when doing the toothpick test). This isn't the case when baking brownies.)


Substitute milk instead of using water if you prefer a gooey brownie.


For a chewy brownie, add ½ cup of brown sugar and ¼ cup of melted butter when mixing your ingredients to either brownie recipe.


If you like extra crispy brownies with a more fudgy center, do this. After making the brownie batter, transfer the batter to the prepared pan and place it in the refrigerator for one hour. Then bake. (You can do this with either brownie recipe.)


The eggs are needed in these two brownie recipes; it makes the texture of the batter creamier; the eggs not only introduce more fat to the batter, but they also help the batter rise when baking. Adding an extra egg yolk will make the brownies richer in texture. As stated above, you may also add in an additional egg, if you prefer your brownies, being even more cake-like when making my cake brownie recipe.


Adding additional oil will also create a more fudge-like brownie. However, using too much oil or butter in brownies will make them greasy and oily. It will also keep them from rising like they should. My fudgy brownie recipe really doesn't need any extra oil added because it's really fudgy without any additional oil. However, an additional one to two tablespoons of oil can be added to my cake brownie recipe to create a more fudge-like texture.


If your brownies sink in the middle, you didn't bake them quite long enough. The edges of your brownies will have visible cracks at the top of them. This is completely normal. The center should also be set and not wiggle at all in the middle when you shake the pan. That's how you know that they are done without doing a toothpick test. Your brownies shouldn't be too runny, if they are, transfer the pan back into the oven.


Using a sharp chef's knife, cut your brownies. Then transfer them to an airtight container (while they are still lukewarm) to keep them moist. Using a serrated edge knife will make your brownies crumble.


Dust your brownies lightly with powdered sugar or cocoa powder to make them even more decadent.


Popular posts from this blog

Vegetables that contain protein

Vegetables that contain protein If food prices have you scrambling down the aisles of the grocery store trying to find something that's more affordable than meat but still has protein, know that you're not alone! Back in the days when my grandparents went through the Great Depression, it was really tough times, but they survived through the hardships by growing their own food. There are a lot of veggies that actually do contain protein, and they're packed full of additional nutrients that our bodies all need. Vegetables highest in protein: Vegetables high in protein include artichokes, asparagus, beans, bean sprouts, and beans in general: broccoli, Brussel sprouts, chickpeas, green peas, kale, mushrooms, mustard greens, spinach, sweet corn, and turnip greens. For a few examples: Black beans contain 15 grams of protein in just a 1-cup serving. In fact, a 1/2 cup of cooked beans provides close to 7 grams of protein, which is the same as eating one ounce of meat. As for collar...

Growing Vegetable Plants in Rockwool Cubes

Growing Vegetable Plants in Rockwool Cubes Hey there, fellow gardeners! Today we're going to talk about a cool way to grow your own vegetables using rockwool cubes. It may sound fancy, but it's actually pretty simple and fun. Let's dive in! What You'll Need: First things first, you'll need some rockwool cubes . These are like little sponges that help your plants grow strong and healthy. You'll also need some vegetable seeds, a tray to hold the cubes, and water. I personally use these hydroponic grow trays with dome lids. Step 1: Soak the Cubes Before you plant your seeds, you'll need to soak the rockwool cubes in water. This helps them absorb moisture and provides a good environment for your plants to grow. Step 2: Plant Your Seeds Once your cubes are nice and soaked, it's time to plant your seeds. Make a little hole in the top of each cube and drop a couple of seeds in. Some seeds are so tiny and I generally end up planting more than two in each cube. ...

Delicious Baked Sesame Seed Breaded White Fish Recipe

Delicious Baked Sesame Seed Breaded White Fish Recipe Elevate your culinary skills with this delectable recipe for baked white fish coated in a flavorful sesame seed breading. This dish is sure to impress your guests and leave them craving for more. Follow the simple steps below to create a mouthwatering meal that is both delicious and nutritious. Ingredients: 4 white fish filets 4 tablespoons sesame seeds 1 teaspoon garlic powder 1 teaspoon paprika Seasoning salt and freshly ground black pepper to taste 2 tablespoons olive oil Instructions: Place the sesame seeds, garlic powder, paprika, seasoning salt, and freshly ground black pepper in a shallow dish and mix well. Brush each fish filet with olive oil and then coat them in the sesame seed mixture, pressing gently to adhere. Place the coated filets on a greased baking tray. Bake in a 400-degree oven for 20 minutes, or until the fish is cooked through and the coating is crispy and golden brown. Serve hot and enjoy your delicious baked ...

Internet Troubles: A Quick Update

Internet Troubles: A Quick Update What’s Going On? Hey everyone! I wanted to take a moment to share something that’s been really frustrating for me. Since early March, my internet has been acting like it’s on vacation—totally gone! I’ve tried so many times to share new posts with you all, but every time I hit “upload,” it just doesn’t work. It’s like my internet is playing hide and seek, and it’s winning! My Struggles I’ve done everything I can think of to fix this problem. I’ve checked my connections, restarted my router, and even called my internet provider for help. But no luck! It feels like I’m stuck in a never-ending game of “Will It Work?” and the answer is always “No.” Keeping It Simple Because of all this trouble, I’m keeping this post super simple. I can’t even add any cool photos right now because I’m not sure if it will upload. I just wanted to let you all know what’s been happening and why I haven’t been able to share more with you. Thanks for being patient with me!

Homemade Fresca Soda

Make Your Own Fresca Soda at Home! Hey there! If you're like me and love Diet Fresca but can't find it in stores anymore, don't worry! I've got a recipe for a homemade version that tastes almost like the real thing. Let's get started! Ingredients: 1 Ruby Red grapefruit, seeded and juiced. Save the peels for steeping 1 lime, seeded and juiced 1 lemon, seeded and juiced 2 teaspoons of Splenda, or your preferred sweetener 1 bottle of sparkling water Instructions: First, chill your sparkling water in the fridge. Peel the outer skin of the grapefruit, lime, and lemon using a vegetable peeler. Make sure to only use the colored part, not the white part. Steep the citrus peels in hot boiling water to extract the oils. Let it cool and strain out the peels. Squeeze the juice from the grapefruit, lime, and lemon using a juicer. Remove any seeds and strain the juice if needed. Combine the fresh squeezed juice with Splenda in a tumbler. Adjust the sweetness to your l...

Jasmine Rice Salad

Jasmine Rice Salad Discover a refreshing and nutritious dish with this jasmine rice salad recipe that incorporates a flavorful variety of mixed vegetables. This recipe offers a delightful combination of textures and tastes, making it a perfect choice for a light lunch or a side dish for any meal. Ingredients: 1 cup of jasmine rice 2 cups of water 2 cups of mixed vegetables (carrots, peas, and corn) Fresh parsley, to taste Add seasoning salt and freshly ground black pepper to taste. Olive oil Instructions: In a medium saucepan, combine 1 cup of jasmine rice with 2 cups of water.   Bring the water to a boil, then reduce the heat to low. Cover and simmer for about 15 to 20 minutes, or until done.   Fluff the rice with a fork and set it aside. Drizzle olive oil in a skillet over medium heat.   Add a sprinkle of seasoning salt and freshly ground pepper to taste. Heat up a skillet with a splash of olive oil over medium heat. Toss in your chopped vegetables and sauté them until ...

Easy Homemade Rolls

Easy Homemade Rolls Get ready to elevate your baking game with these delightful homemade rolls! There are countless creative ways to shape loaves of bread, buns, and rolls, from classic round rolls to cloverleaf, crescent, and knotted varieties. My versatile dough recipe is a true kitchen superstar, perfect for crafting everything from cinnamon rolls to sweet rolls and even loaves of bread. Today, we’re focusing on making large, fluffy classic round rolls that are perfect for any occasion! Ingredients: 2 ½ tablespoons of active dry yeast 1 1/4 cups of warm water 1 tablespoon of honey 1/3 cup of cooking oil 1/4 to 1/2 cup of granulated Splenda or regular sugar 1 teaspoon of seasoning salt or kosher salt 4 1/4 cups of all-purpose flour Let’s Get Baking! First, grab a big bowl and mix together 2 ½ tablespoons of active dry yeast, 1 1/4 cups of warm water, and 1 tablespoon of honey. Give it a good stir and let it sit for about 10 to 15 minutes. You’ll know it’s ready when it gets all froth...

Delicious Honey Divinity With Chopped Pecans

Delicious Honey Divinity With Chopped Pecans The holidays just wouldn't be the same at my house without a batch of homemade divinity. This sweet treat is decadent, light as air, and absolutely delicious! If you encounter challenges while preparing my divinity recipe, please refer to the end notes for troubleshooting tips. The technique I am sharing is effective for all divinity recipes that do not yield the desired results. Ingredients: • 2 cups of granulated Splenda or granulated white sugar • 5 tablespoons and 1 teaspoon (1/3 cup) of premium honey • 5 tablespoons and 1 teaspoon (1/3 cup) of water • 2 egg whites, beaten to soft peaks • 1 1/2 cups of chopped pecans, chopped Maraschino cherries, or chocolate chips Instructions: Here's a fun and easy recipe for making delicious divinity candy! First, grab a heavy-bottomed pan and mix together granulated Splenda or sugar, honey, and water. Boil the mixture until it reaches a hard ball stage. To test if it's ready, drop a small...

Christmas Fruit Salad

Christmas Fruit Salad Create a festive and refreshing addition to your holiday spread with this delightful Christmas fruit salad recipe. Perfect for bringing a burst of color and flavor to your table, this salad combines a medley of fruits, including fruit cocktail, apples, bananas, cuties, and grapes, all topped with sugar-free Cool Whip. Whether served as a side dish, dessert, or potluck contribution, this easy-to-make dish is sure to be a hit with family and friends. In this article, we will explore the ingredients needed, preparation steps, serving suggestions, nutritional benefits, variation options, and storage tips for this delicious Christmas treat. Introduction to Christmas Fruit Salad Recipe Tis the season for a refreshing and festive twist on the classic fruit salad! This Christmas fruit salad brings together a delightful mix of flavors and colors to brighten up your holiday table. Say goodbye to boring fruit salads and hello to a merry medley that will have your taste buds ...

25 Vegetables That Can Be Grown in the Winter

25 Vegetables That Can Be Grown in the Winter Winter is approaching rapidly, and you've worked hard to harvest your summer and fall crops. So, now what? Well, winter may be just around the corner, but you can still plant hardy varieties of winter vegetables in your garden, cold frames, grow tunnels, and greenhouses. Below, I have listed 25 vegetables that can withstand a hard frost that you can grow successfully this winter with some tender love and care. Asparagus Artichokes Arugula Beets Brussel Sprouts Broccoli Cabbage Carrots Cauliflower Chives Collards Green onions English peas Fava beans Kale Leaf lettuce (plant in grow tunnels) Leeks Mustard greens Perennial onions Parsnips Radishes Rhubarb (Remember that rhubarb leaves are highly toxic; the stalks are what's edible.) Rutabaga Spinach Swiss Chard Turnip greens and turnips   Generally, when gardening outdoors, I like sticking with perennial greens and various other perennial vegetables that don't die at the end of the...